Snap the Invisible: What a Smartphone Microscope Adapter Can Do
A smartphone microscope adapter links your phone camera to a microscope, making powerful imaging portable and affordable for students, hobbyists, educators, and field researchers.
Common uses include classroom labs, quick diagnostics, nature observation, and specimen documentation. It democratizes microscopy without heavy investment or complex training and broad access.
This article explains adapter principles, mount types, selection advice, setup and alignment tips, and image processing, annotation, and sharing techniques so you can capture clear, useful microscope photos with minimal fuss reliably.


Explore Microbes Up Close with a DIY Phone Microscope
Why Use a Microscope Camera Adapter with Your Smartphone?
Real advantages: affordable, fast, shareable
A smartphone adapter turns a device you already own into a capable imaging tool. Compared with dedicated microscope cameras (AmScope MU1000 or similar USB cameras often $150–$400), adapters plus a phone typically cost $20–$80. You keep portability—no laptop tethered to the bench—and you get instant access to powerful smartphone apps for exposure, white balance, and post-processing.
Where it shines (real-world examples)
Limitations to expect and quick tips
Actionable tips:
This sets realistic expectations so you can decide whether an adapter fits your workflow.
How Microscope Camera Adapters Work: Basic Principles
Two optical approaches: Afocal (eyepiece projection) vs direct projection
Afocal (eyepiece) mounting captures the image the eyepiece sends to your eye: you align the phone camera with the eyepiece exit pupil and photograph the virtual image. It’s forgiving (works with many eyepieces), but magnification and apparent field depend on eyepiece power, phone crop factor and digital zoom. Vignetting and light loss are common if the camera lens and eyepiece exit pupil aren’t well matched.
Direct projection (prime focus) feeds the microscope image straight to the camera sensor via the microscope’s camera port or a relay lens. This gives more consistent optical magnification, higher light throughput, and less vignetting — popular in labs with a trinocular head.
Mechanical alignment and distance
Precise centering and stable clamping prevent dark corners and blurred frames. Key steps:
Smartphone camera features that matter
Types of Adapters and Mount Designs
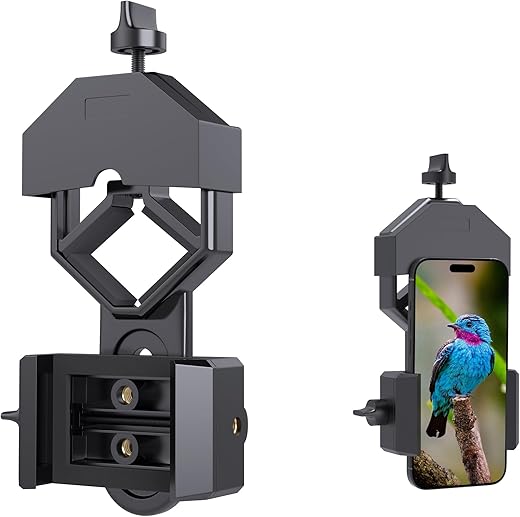
Clamp-style vs. sleeve and custom-fit
Clamp-style universal adapters (Celestron NexYZ, generic AmScope phone mounts) grip around an eyepiece and are great for one-off shots or field use. Threaded or custom-fit sleeves slip over specific eyepieces or camera ports for a more repeatable, low-vignetting result — think laboratory sleeves cut to the eyepiece diameter.
Materials and rigidity: metal, plastic, foam, silicone
Rigid mounts (anodized aluminum, steel, or ABS plastic) keep alignment steady for high-magnification work; hobbyists often prefer metal for repeatability. Flexible silicone or foam-lined holders are forgiving with odd-shaped phones and protect finishes, but can introduce slight shifts. Tip: use foam liners to avoid scratching delicate eyepieces.
3D-printed and bespoke mounts
Thingiverse and microimaging forums host many 3D-print designs tailored to specific microscope heads or phone models. They’re inexpensive and customizable — add a threading or a rotation collar — but print tolerances matter: PLA can flex; PETG or nylon prints are stronger.
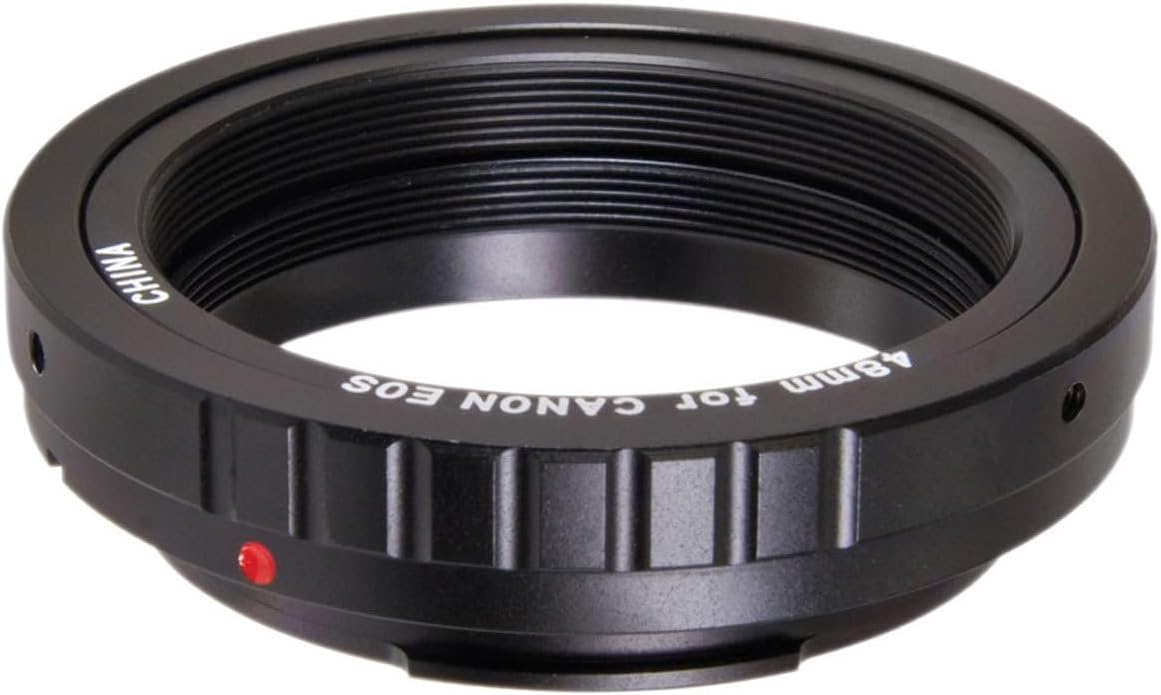
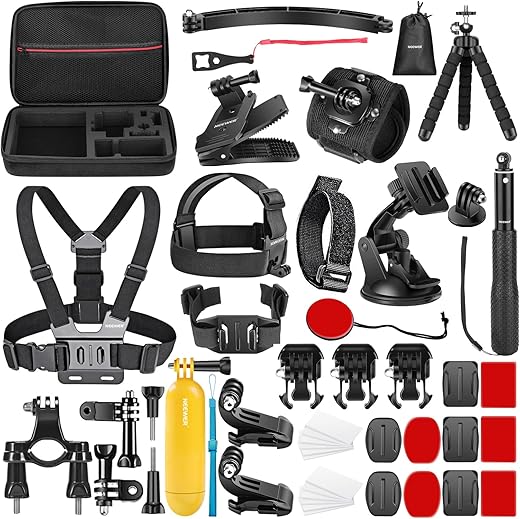
Trinocular ports, quick-release, and accessories
Dedicated camera-port adapters (C-mount/eyepiece relay) on trinocular heads give direct projection and better light throughput. Useful accessories:
Practical tip: test alignment on a printed grid — if the field centers cleanly, you’ve found the right mount.
How to Choose the Right Adapter for Your Needs
Ask the right questions first
Start by answering a few practical things:
Match fit and tolerance
Measure eyepiece diameter and note your phone’s camera offset. Adapters that claim “universal” often tolerate ±1–3 mm; for high magnification you want tighter tolerance to avoid vignetting and tilt. If your phone has multiple rear lenses, confirm which lens the adapter will align.
Off-the-shelf vs. custom/3D-printed
Buying checklist and quick tips
Next: practical setup and alignment techniques to turn your chosen adapter into consistently sharp, shareable images.
Practical Setup, Alignment, and Capture Techniques
Step-by-step workflow
- Prepare the microscope: switch on stable illumination, set condenser and field diaphragm so the light is even across the field, and roughly focus the specimen at the eyepiece. A quick classroom trick: close the field diaphragm until you see its edges, then open until the field fills the view—this centers illumination.
- Secure adapter and phone: clamp the adapter to the eyepiece, then mount your phone. Tighten gently to avoid tilt; use a remote shutter or timer to prevent bumps.
Alignment and fine-tuning
Troubleshooting common problems
Photo vs. video tips
Next you’ll learn how to clean up, annotate, and share these captures efficiently.
Processing, Annotating, and Sharing Microscope Smartphone Images
Basic image processing
Start with simple edits: crop to the area of interest, correct exposure and white balance, then apply gentle sharpening. For high-magnification stacks, use focus stacking to extend depth of field—capture a z-series, then merge in dedicated software to avoid misleading single-plane images. A quick classroom trick: stack a few frames from a short video to rescue detail from a moving specimen.

Recommended apps and tools
Metadata, labels, and formats
Always save a lossless master (TIFF or DNG/RAW) and export JPEGs for sharing. Embed EXIF metadata: magnification, objective, illumination, specimen ID, date/time. Calibrate with a stage micrometer; then add a scale bar in ImageJ rather than guessing sizes.
Sharing, collaboration, and archiving
For remote demos use Zoom/Teams or live stream with OBS; cloud folders (Google Drive/Dropbox) support collaborative annotation. Archive masters with a README describing methods; cite images in reports with specimen, date, magnification, and processing steps to keep your work reproducible and trustworthy.
Next, we’ll wrap up with a final note on why this workflow turns phones into powerful microscopes.
Making the Invisible Visible with Your Phone
Adapters bridge consumer smartphones and optical microscopes, unlocking affordable microscopy for education, hobbyists, and fieldwork. With the right mount, alignment, and lighting you can capture clear, usable images without expensive camera hardware, expanding what your phone can reveal.
Start simple: test a basic adapter and workflow, then iterate with accessories or custom mounts as skills grow. Choose adapters to match needs, refine setup and post-processing, and share discoveries to inspire others and learn.


I appreciated the mention of using annotations for teaching — I use a 4K WiFi USB Handheld Digital Microscope with stand for remote lessons and annotate live. Pro tip: share lower-resolution streams for students with slow wifi, and provide high-res captures afterward.
Do you use any specific software for live annotation? I’m looking to do the same for my community lab.
I use OBS for stream routing and a simple annotation layer, plus Zoom’s whiteboard for quick marks. Works well.
Great practical teaching tip — adaptive streaming quality keeps sessions inclusive. Thanks for sharing how you integrate hardware and pedagogy!
Okay, real talk: I tried microscope smartphone imaging once and ended up with 200 blurry beetle photos. 😂 The article’s capture technique tips were clutch — never knew about tiny adjustments to the eyepiece to reduce chromatic fringing.
Lol beetle graveyard. Try focus stacking next time for more depth — really helps with 3D subjects like insects.
Been there — beetle photos are an initiation rite. Small lateral adjustments can indeed reduce fringing because you align the optical axes better; also try stopping down if your microscope allows it.
Stacking + good LED side lighting = museum-quality bug pics (well, almost).
Question: for someone on a tight budget, would the APEXEL 100x Nano Phone Micro Lens be worth getting, or should I save for a 4K WiFi USB handheld microscope with stand? I mostly want to look at plant cells and insects.
Good question. If portability and occasional quick shots are your priority, the APEXEL is cheap and fun for macro/very close-up views. For more serious, higher-resolution work and consistent lighting, the 4K USB handheld microscope + stand is a better long-term option. Also consider whether you want eyepiece-style observation (adapter + microscope) vs direct handheld imaging.
I had both — APEXEL is fun for field stuff, but the 4K scope with a stand gives much better depth of field and consistent lighting for plant cells. Depends how ‘serious’ you want to be.
Anyone tried the ‘Universal Smartphone Mount for Telescopes and Microscopes’ on a phone with multiple cameras? I keep getting the wrong lens aligned (ultrawide), ugh.
I use an app called ‘Open Camera’ (Android) to lock the lens. Works like a charm.
This is a common issue — many multi-camera phones default to ultrawide or switch lenses automatically. Use your phone’s camera app to select the main (1x) lens, then lock exposure/focus or use a third-party app that lets you force a specific lens. Physically centering the adapter over the correct lens helps too.
On iPhone you can pinch to choose the 1x and lock focus — annoying but doable.
Awesome article — finally something that explains adapter types without the fluff. I bought a GOSKY Universal Smartphone Adapter last month and your notes on alignment nailed it for me. One quick tip I discovered: rotate the phone slightly while focusing to reduce vignetting on older eyepieces.
Thanks Rachel — glad the piece helped! Rotating the phone is a great practical trick; it can also help you find the sweet spot where the phone camera axis matches the eyepiece. Appreciate the tip!
Nice—good to know that the GOSKY works well. I’ve got one gathering dust, might try your rotation trick tonight.
Vignetting was driving me nuts too. I ended up using a tiny bit of black tape around the adapter to block stray light.
Totally loved the section on processing and annotating images. You explained stacking and contrast adjustments really clearly.
One suggestion: maybe add a short workflow for free tools only (like using Snapseed + ImageJ) for readers who don’t want to buy software.
Great idea — I can add a short free-tools workflow in an update. Snapseed for quick tweaks and ImageJ for stacking/measurements is a solid combo. Thanks for the suggestion!
Agree — ImageJ is a lifesaver, though the learning curve is annoying. A step-by-step would be perfect.
Yes please! Free workflows are always welcome. 👍
This is a long one — sorry, I get chatty. 🙂
I followed the practical setup steps and finally managed a usable shot of a pollen grain. Things that helped me:
1) Use a macro app to control focus and lock exposure.
2) Black card behind the slide reduced reflections.
3) Tiny tape to secure the adapter so it doesn’t slowly drift.
Would love to see more on slide prep for hobbyists (staining tips, mounting media).
For staining, iodine and methylene blue are gentle starters. And warm the mounting medium slightly to avoid bubbles.
Love the detailed write-up — exactly the kind of hands-on tips readers need. I’ll add a section on beginner slide prep and safe staining options suitable for hobbyists. Thanks for the suggestions!
Don’t forget to label slides! I once lost track of samples and cried a little. 😂
Heads-up for beginners: don’t assume the highest magnification toy (like a cheap 100x lens) will give the best pictures. The article covers this, but it’s worth repeating — optics, lighting, and stability matter way more than the stunt factor.
Exactly — magnification without resolving power is just bragging rights. Glad the article conveyed that, and appreciate the reinforcement.
Amen. Clarity over zoom. Also, learn to tweak lighting — it transforms a mediocre lens into a useful setup.
Preach. My cheap 16X eyepiece on a proper microscope beats the 100x phone lens most days.
Loved the humor in the ‘making the invisible visible’ wrap-up — made me smile. On a more practical note, anyone found a lightweight adapter that fits both phone cases and naked phones without fiddling? My phone has a chunky case.
Thanks! Some universal adapters come with extendable clamps or removable phone cradle inserts that accommodate cases. The GOSKY has a design that works with many cases, but for very bulky cases you might need to remove it or use a phone holder that attaches to the adapter rather than clipping onto the phone.
If your case is thick, take it off for sessions. The clarity improvement is worth five minutes of fiddling.
I bought a cheap silicone case and left the inside hollow — fits adapters much easier. Not elegant but works.
Minor complain: the section on mount designs was a bit heavy on terminology — maybe add a few annotated pictures? I had to re-read some bits. Otherwise great info though.
Agreed, diagrams would help. Especially for the different optical paths between projection vs eyepiece adapters.
Noted — adding annotated images or diagrams is on the to-do list. Thanks for the candid feedback!
Hmm, I tried using a 23.2mm Smartphone Adapter with Built-in 16X Eyepiece on my old Olympus and the image was soft. Any ideas? I followed the alignment steps in the article closely.
Also check cleanliness — tiny fingerprints on the built-in eyepiece will kill sharpness. 😅
Softness can come from several sources: (1) eyepiece not parfocal with the objective — try switching eyepieces or adjusting focus on the microscope; (2) phone camera might be using digital zoom or autofocus hunting — set exposure/focus lock if possible; (3) slight tilt or decentering — minute shifts can blur the image. Try a tripod or clamp to stabilize the adapter.
Small nitpick: the product list could be more geographically aware — some Amazon links aren’t valid in other countries. Maybe mention equivalent models or how to search locally? Otherwise, super helpful guide.
Yes please — global readers appreciate that. I had to hunt for a UK version of the adapter last year.
Good point. I’ll add a note about regional availability and tips for searching equivalent models by size (e.g., 23.2mm) or keywords like ‘universal smartphone adapter eyepiece’. Thanks!