
Why Telephoto Matters: Getting Closer Without Getting Closer
Telephoto lenses let you isolate subjects and compress perspective from a distance.
This guide gives gear choices, camera settings, and field techniques for birds and sports. It covers autofocus strategies, stabilization, and a practical post-processing workflow.
Whether you are a beginner or experienced shooter, you will get actionable tips to improve reach, sharpness, and timing.
Expect practical examples, quick checklists, and real-world advice you can use during outings. Read on to learn how to capture crisp, compelling images right now.


Master Bird Photography with a Telephoto Lens: Essential Tips
Picking the Right Telephoto: Focal Lengths, Aperture, and Format
Focal-length quick map
Choose focal length by subject distance and mobility. Typical starting points:
Crop sensors multiply apparent reach (APS-C 1.5x/1.6x, APS-H/Canon 1.3x). A 400mm on a 1.6x body behaves like ~640mm — great for birds, less so for wide-field sports.
Prime vs. Zoom: trade-offs in the field
Primes: superior sharpness, wider max apertures (f/2.8, f/4), faster AF — but heavy, single-length, and costly (e.g., 400mm f/2.8).Zooms: versatility and framing speed; modern zooms (100–400mm, 200–600mm) deliver excellent IQ with lighter packs — ideal for travel and mixed subjects.
Aperture and low-light performance
Wider apertures give subject isolation and let you keep shutter speeds high. They also help AF systems by providing more light; many cameras struggle past f/8. If you often shoot twilight games or shaded woods, prioritize faster glass or higher-ISO body performance.
Teleconverters and practicalities
Use 1.4x to extend reach with modest IQ loss; 2x doubles focal length but costs two stops and can limit AF. Consider weight, carry comfort, and budget — a lighter 100–400mm plus a 1.4x can beat lugging a fixed 600mm for many outings.
Next: how to make those lenses deliver crisp, in-focus action.
Camera Settings and Autofocus Strategies for Fast Subjects
Shutter speed, aperture, ISO — quick baselines
Match shutter to subject size and speed. Start here and adjust for light:
If light is limited, open aperture first, then raise ISO; modern bodies (Sony A1, Nikon Z9, Canon R3) handle high ISO cleanly. Remember depth of field shrinks with longer focal lengths — stop down slightly if critical focus matters.
Autofocus modes & area choices
Technique, drive modes, buffer management
Use back-button focus to separate composition from focus; it dramatically improves tracking consistency in the heat of action. Choose high burst for decisive frames but be mindful of buffer and card speed — slow cards or RAW+JPEG will choke long bursts. If buffer fills, drop FPS or switch to high-speed JPEG-only for a run.
Metering & AF tracking customization
For backlit subjects, use spot/partial metering or +1 to +2 EV exposure compensation to avoid silhouettes. Use highlight-weighted metering for sunlit snow/sky.
Tune AF tracking: increase initial sensitivity for abrupt direction changes; enable acceleration/deceleration tracking for subjects that speed up/slow down. If your camera offers tracking delay, lengthen it slightly for panning sports to avoid refocusing on background players.
Bird Photography Tactics: Fieldcraft, Flight, and Perch Shots
Habitat scouting & reading behavior
Walk the patch before you shoot. Note favorite perches, feeding edges, flight corridors and the time of day birds use them — gulls loaf late morning, warblers move at first light. Move slowly, watch body language (head-turns, wing-flicks) and position yourself downwind to avoid detection.
Perch shots — step-by-step
Compose for clean negative space and place the eye on a rule-of-thirds intersection. Get slightly below eye level if possible. Use single-point AF on the near eye; if branches interfere, pre-focus on the perch and recompose. Soften busy backgrounds with wider apertures (if available) or shift your angle to isolate the subject.
Flight techniques
Anticipate launch: focus on takeoff points (reed edges, exposed branches). For small fast birds, aim 1/2000s+; for hawks/gliders, 1/1000–1/1600s. Use AF-C with a dynamic/zone area and back-button focus. Pre-focus on a likely path and start the burst at the first wingbeat peak to catch spread wings or transition moments.
Ethics, hides & low-light tactics
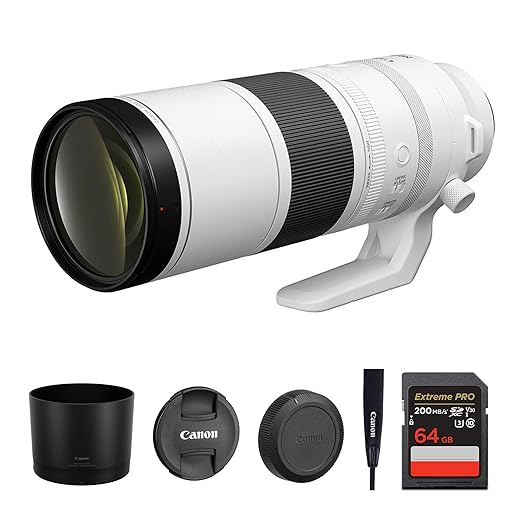
Pop‑up hides and long waits yield bold portraits (I once got a kingfisher by sitting 90 minutes in a camo pod). Never approach nests closely — use longer glass or cropping; a 600mm prime (Canon RF 600mm f/4, Sony 200‑600mm, Sigma 150‑600mm) beats disturbance. Boost ISO to preserve shutter speed but test noise performance — modern bodies tolerate ISO 3200–12800 differently, so know your camera’s sweet spot. In dark forests or dawn, favor slightly slower shutter with steady support, anticipate behavior, and learn typical perching routes to be ready when light peeks through the canopy.
Sports Shooting: Anticipation, Panning, and Composition
Anticipation & Positioning
Reading the game wins frames. Learn set-piece patterns (corner kicks, pick-and-rolls) and position where play funnels — endlines, dugouts, or near the box. Watch body language: a quarterback’s eyes, a striker’s hips. Arrive early, walk the touchlines, and test sightlines for backgrounds and sun angles.
Tracking & Shutter-Speed Choices
Use AF-C (continuous) with wide-area or zone tracking and back-button focus. Match shutter to sport:

Panning Technique
Choose a shutter slower than freeze-speed (try starting at 1/125s). Rotate from the hips, track smoothly, start the pan before the subject reaches your frame, squeeze the shutter at the end of the motion. Practice with cyclists: repeatable lines make the technique intuitive.
Composition & Practicalities
Isolate athletes with shallow DOF (70–200mm f/2.8, 300mm f/4 primes) to blur busy stadiums. Frame wide for context (fans, scoreboard) and tight for emotion (faces, equipment). For fences/glass: get low, shoot between links, or pre-focus close to the mesh to render it soft. For stadium work, consider 300–600mm for distant seats, 70–200mm for sidelines. Always ask officials/teams about credential rules — a polite conversation often unlocks better angles.
Stabilization, Handling, and Post-Processing Workflow
Support options: monopod, tripod, and gimbal heads
Long lenses demand support. Monopods (Really Right Stuff, Manfrotto) give mobility and vertical steadiness for birds and sideline sports; tripods (Gitzo or Manfrotto carbon legs) provide absolute stability for perch or static action. For heavy glass, a gimbal head (Wimberley, Benro) lets you pan smoothly and balance weight for quick follow-ups.

Quick comparison:
Handholding, bracing, and breathing
When handholding, use the lens collar foot as a secondary grip, tuck elbows into your ribs, and brace against a fence or car. Breathing technique: inhale, exhale halfway, hold briefly, then squeeze the shutter. Practice the “half-exhale” on moving birds — it reduces camera bounce more than shallow breaths.
In-lens stabilization (IS/VR/OSS)
Enable stabilization for handheld; switch to panning mode (stabilizes one axis) for smooth motion blur. On secure tripods, many modern systems can stay on, but if your lens/camera has a tripod detection or you see micro-corrections in long exposures, turn IS off to avoid blur.
Maintenance & weatherproofing
Use a padded rolling case for travel, lens socks for quick protection, and gaffer tape on collars to prevent slips. Carry rain covers and silica packs; wipe seals and collars after salty or rainy shoots.
Post-processing workflow
Start in RAW: set exposure, recover highlights, and correct white balance. For high ISO: apply modest luminance reduction, preserve color detail, and use mask-based sharpening only on the subject to keep bokeh smooth. For slightly soft frames, try deconvolution or local clarity rather than global sharpening. Crop conservatively to maintain subject isolation and aspect ratio.
Cataloging & learning
Review EXIF: shutter, ISO, focal length, support. Keep a simple log (notebook or spreadsheet) of conditions and outcomes — small notes yield big improvements over a season.
Next, we bring these pieces together in the article’s conclusion.
Bringing It Together: Practice, Patience, and Persistence
Put the pieces together with consistent practice: try lenses, tweak settings, rehearse autofocus and framing until muscle memory forms. Learn from each outing — successes and failures both teach — and prioritize technique over chasing the latest glass.
Apply the strategies here in the field, review your images critically, refine your approach. Invest in gear when it supports your goals, but remember skill development yields the biggest gains. Get out and shoot.


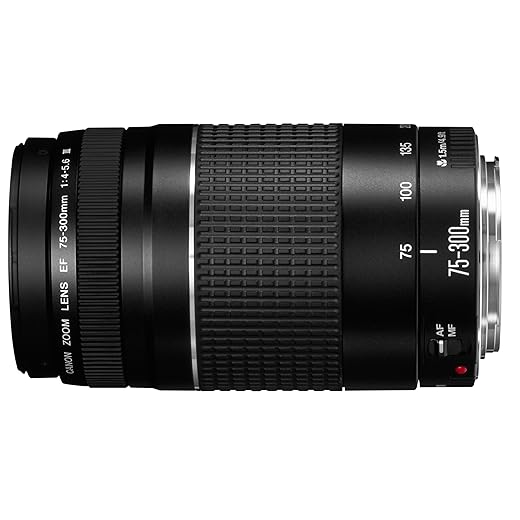
Quick question for autofocus tips: for birds in flight, do you guys recommend continuous AF with back-button focus? The article mentions AF strategies but I’m still experimenting with tracking modes on my Canon kit (using the RF 75-300 sometimes).
Yes — back-button AF with continuous tracking (AI Servo / Tracking) is what many pros use. It separates focus from shutter and gives you more control for birds in flight.
Agree. Also try setting AF area to zone or large zone for quick direction changes, and tweak tracking sensitivity if your camera allows it.
I laughed at the ‘practice, patience, persistence’ ending because that’s basically my life with warblers.
Spent three hours in a blind last week, saw one bird, got three forgettable shots, and a squirrel stole my sandwich. But hey — each failure feels like a lesson 😅
Would love more tips on perch shot patience tricks though.
Totally relatable, Isabella. Perch patience is all about knowing routines — feeding times, favored perches, and a bit of camouflage. We’ll add a short checklist for perch-shot scouting.
Also try setting up near water sources — birds often perch where they can watch for predators after a drink. Small timing wins add up.
Sandwich theft = classic field hazard 😂 Bring extra snacks and a friend to scare away squirrels!
Love the Tamron 70-300 callout — grabbed one last year and it’s been a beast for backyard birds. Quick tip: shoot early morning light and dial aperture to f/5.6 when you can for decent background blur. Also, the compact size makes hiking so much easier. 🙂
Glad it helped, Maya! Totally agree on the early light — and the Tamron’s RXD focus is surprisingly snappy for its class.
Yep, +1 on hiking with that lens. I added a cheap gimbal head later and panning got way smoother.
Do you use a monopod or just handhold? I’m torn between the Altura monopod and a light tripod.
Ha — the panning section made me laugh because my first attempts looked like modern art 😂. Practiced with a friend in a soccer game and used a monopod (Altura) — took weeks but finally got consistent streakless motion shots.
Modern art panning is a rite of passage! Glad the article helped and nice persistence, Noah.
LOL same here. I found a slower shutter (1/60–1/125) and continuous AF helped the most for handheld panning.
Thanks Lily — tried 1/100 last weekend and it was the sweet spot for me.
Liked the bird fieldcraft section, but would have loved more on ethics (how close is too close?) and legal considerations at reserves. Also, sample shutter/aperture combos for different bird sizes would be super helpful.
Noted — thanks for pushing for more practical guidance.
Thanks Ryan — that’s the kind of practical line I was hoping to see in the article.
Excellent suggestions, Ava — we’ll add a short ethics/legal sidebar and some quick aperture/shutter tables in the next update.
For ethics: if a bird changes behavior because of you, you’re too close. Simple rule and saves a lot of trouble.
Curious about budget choices: is the Tamron 70-300 really the best bang-for-buck over the Canon RF 75-300 for casual birders? I don’t need the extreme reach, but want decent IQ and AF.
I had both — Tamron felt more robust and sharper for me. But if price is the main driver and you’re on EF/RF adapter headache, Canon 75-300 can still deliver decent results.
If you want portability and solid autofocus on a budget, Tamron 70-300 is a fantastic choice. The Canon RF 75-300 is lighter and cheaper but a bit less versatile at longer reaches. Depends on how often you need longer reach vs. portability.
Technical Q: when you mentioned aperture vs. format, how much does crop factor change perceived depth of field at the same aperture? I’m using a crop-body with the Tamron and wondering if I should stop down for better subject separation.
Practical tip: shoot wide open for flight (AF/ISO tradeoff), stop down to f/6.3–8 for perched shots on crop bodies to get a bit more sharpness and keep blur acceptable.
Short answer: crop sensors give a slightly deeper DoF at the same framing/aperture because you use a shorter focal length or crop the image. So if you want similar background blur as full-frame, open up one stop (if lens allows) or use longer focal length. But subject isolation also depends on distance to subject/background.
Great article overall. Short, practical, and no fluff. I used the NEEWER GM101 head on a heavy VICTIV tripod for shorebird winter sessions — game changer for smooth follow and quick transitions between horizontal/vertical framing.
I used a mid-weight body (R-series mirrorless) with the 200-800. The tripod felt sturdy, but if you’re mounting the biggest super-tele, get an even beefier leg set.
How heavy of a camera did you pair with that setup? Thinking of putting an 800mm on a gimbal and getting nervous 😅
Good caution — always match head/tripod ratings to your heaviest lens+body combined weight.
Appreciate that, Ethan! Love hearing about the NEEWER + VICTIV combo working in the field.
Nice roundup but the Canon RF 200-800mm is enormous. Great reach, sure, but lugging that around all day is brutal. Article could’ve had a stronger section on balancing reach vs. ergonomics (and maybe more on monopod vs. tripod tradeoffs).
Thanks — good tips. Might try a monopod first before committing to the heavy tripod setup.
Solid point, Liam — we did touch on stabilization and handling but could add a deeper comparison of rigs for long shoots. Thanks for the nudge!
If you’re hiking a lot, consider the Tamron or the Canon RF 75-300 for lighter setups. Or use a monopod when you need mobility.
I rented the 200-800 for a weekend soccer tournament. The reach is insane, but I used a gimbal head (NEEWER GM101) on a heavy-duty tripod and it saved my shoulders.
Really appreciated the section on stabilization and post-processing.
I use a VICTIV 74-inch tripod for most perched bird shots and switch to an Altura monopod when stalking in brush. The article’s workflow tips (light sharpening, noise reduction, crop restraint) are spot on.
One tiny nit: a sample LR/CR preset recommendation would be awesome. 🙂
Great workflow notes, Sophia — we’ll consider adding a starter preset in a follow-up. Thanks for describing your kit use, that’s exactly the kind of real-world detail readers like.
If you want a quick preset: modest noise reduction + 25% sharpening around 60 radius works for many tele shots. YMMV depending on sensor.