Why Remote Shutters Matter for Night Sky Photography
Remote shutters and intervalometers transform night sky photography by removing camera vibration, enabling precise long exposures, and automating repeatable sequences. With a remote trigger you lock down sharp stars, run multi-frame exposures for stacking, or create smooth timelapses without touching the camera. This reliability is the backbone of successful astro work.
This article walks you through choosing the right remote—wired, wireless, or app-controlled—and understanding key features like interval timing, exposure control, and bulb ramping. You’ll get setup and shooting best practices for minimizing vibration and optimizing camera settings. We also cover troubleshooting common pitfalls and advanced workflows: automation, star tracker integration, and remote monitoring. Ready to elevate your night sky photography today.


Essential DSLR Settings for Astrophotography: A Beginner’s Tutorial
Choosing the Right Remote Shutter or Intervalometer: Wired, Wireless, or App-Controlled?
Types compared: quick buyer’s snapshot
Wired remotes are simple, cheap, and nearly vibration-free — perfect for single long bulb exposures. Dedicated intervalometers add programmable intervals, long-count limits, and precise delays for stacking and timelapses. App-controlled or wireless systems (Bluetooth/Wi‑Fi or radio) give live control, framing preview, and easier remote field adjustments — handy when you’re miles from the car.
Compatibility & ports: don’t buy blind
Check your camera’s remote interface: hot-shoe, 2.5mm/3.5mm jack, proprietary multi-pin (Canon N3, Nikon MC-DC2), or USB/serial. Confirm protocol and pinout in the manual — one photographer I know bought a “universal” remote only to find his Sony used a different pin order. If using app-based solutions, verify that the maker supports your camera model and firmware.
Power, build, and reliability
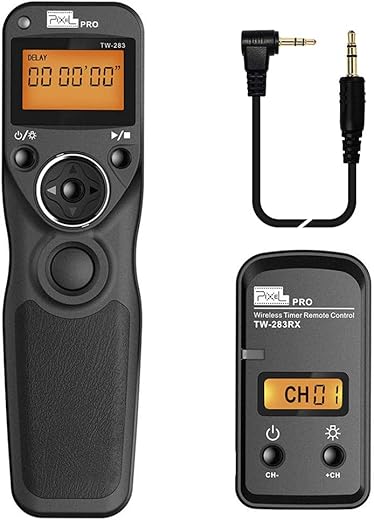
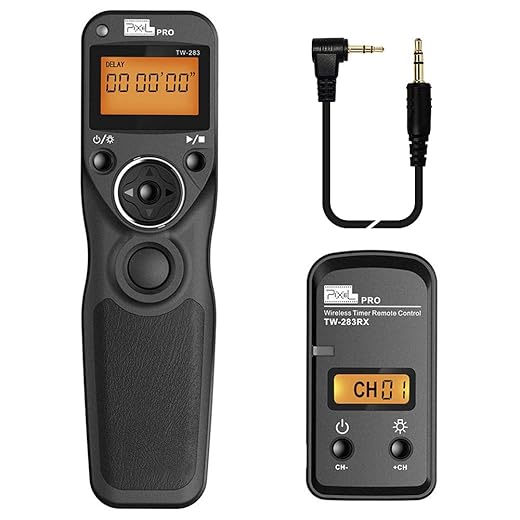
Consider battery type and runtime: AA-based units (Vello, Pixel) offer field-swappable cells; coin-cell or sealed units need spares. Professional radio triggers (PocketWizard, Godox) boast metal bodies and weather resistance; budget intervalometers may feel flimsy and fail in cold. If you plan winter shoots, favor rugged housings and external power/USB options.
Essential features checklist
Match to use cases
Protocol & third‑party tips
Always verify manufacturer protocol compatibility. Community forums reveal which third‑party remotes work with specific firmware — adapters exist (2.5mm to N3, etc.). If in doubt, choose a modular solution that pairs a dedicated intervalometer with optional wireless control for maximum flexibility.
Understanding Key Features: Interval Settings, Exposure Control, and Bulb Ramping
Core terms that determine your results
Knowing the vocabulary clears up half the battle. Quick definitions with night-sky examples:
Bulb functions and bulb ramping
Bulb lets you control arbitrary long exposures. Bulb ramping gradually changes exposure length (or ISO/aperture via compatible systems) over a sequence—perfect for a dusk→Milky Way timelapse where sky brightness changes dramatically. Practical example: ramp from 1/4s to 25s over 90 frames to avoid flicker and blown highlights.
Exposure control strategies and timing accuracy
Decide whether to stack or shoot single longs:
Long-exposure noise reduction (LENR) doubles cycle time (exposure + dark frame). When LENR is on, increase interval accordingly or use automated dark-frame capture between sequences to avoid lost frames.
Advanced options to seek: programmable sequences (multiple ramps/sets), automated dark-frame capture, and high-precision clocking. Even millisecond timing drift matters for stacking and star alignment—choose intervalometers with accurate, repeatable timing to ensure consistent frames across a shoot.
Setup and Best Practices: Minimizing Vibration, Camera Settings, and Mounting
Minimizing vibration — physical measures that actually work
A single nudge destroys star sharpness. Start with the basics: a stiff tripod (Gitzo or a solid Manfrotto 190/055 series) and a secure head (Really Right Stuff ball heads or sturdy 3‑way pan heads). Use quick‑release clamps to avoid fiddling with plates in the cold. Route your shutter cable so it never pulls on the camera — tape or a small Velcro loop near the tripod head. Quick anecdote: I once had a soft tug from a dangling cable cost me an otherwise perfect 30s frame; a strip of gaffer tape fixed that instantly.
Camera settings — focus and exposure for peak SNR
Mounting, cold, wind, and dew
Mount intervalometers or remotes in a small pouch attached to a leg or head; adhesives and Velcro work well in cold. Add a weight (camera bag or 2–5 kg dedicated weight) to the tripod center for windy nights. Use windbreaks if available.
For dew: use a dew heater band, chemical warmers behind the lens, or anti‑dew gels for extended sessions.
Pre‑shot test checklist
Proceed once everything remains rock‑steady for the duration of your sequence.
Shooting Strategies: Long Exposures, Stacking, and Timelapses with Intervalometers
Long single exposures vs. stacking short sub‑exposures
A single long exposure (several minutes) can capture faint nebulosity in one frame, but stacking many shorter sub‑exposures often wins for noise control, dynamic range, and sensor heat management. Real-world rule: use single long frames when your mount and guiding are excellent; use stacking when you want better total signal with less thermal noise and fewer tracking hassles. Stacking 20–60 x 120s frames often produces cleaner results than a single 2,400s exposure because hot‑pixel buildup and amplifier glow are averaged out.
Recommended exposure/interval recipes

Timelapses: setting intervals and bulb ramping
For smooth timelapses use near‑gapless intervals: set interval = exposure + processing buffer (1–2s). For true gapless, many intervalometers support “exposure + 0s” modes or camera‑tethered triggering. Use bulb ramping to smooth changing light (Milky Way setting or dawn): program small incremental exposure/ISO steps per frame (e.g., 1–3s or 1/3 EV steps) over the sequence.
Dithering to improve stacked quality
Use intervalometer commands (Pixel, Aputure models, or mount software) to add small random or patterned offsets between frames, or enable camera‑body sensor‑shift dithering if available. Dither every 2–5 frames to reduce fixed pattern noise and improve cosmetic results in stacking.
Automating calibration frames
Automate darks: immediately after lights, cap lens and run identical exposure sequence (same temps). Flats: use a flat panel or dawn sky, set aperture and shutter for mid‑histogram exposure, run 20–50 frames via intervalometer. Bias: capture 50–100 at the shortest exposure. Automating these saves field time and ensures consistent calibration sets.
Troubleshooting and Common Pitfalls: Signal Loss, Battery Drain, and Timing Errors
When a night’s worth of exposures vanishes because of a flaky trigger or a dead battery, it stings. Below are quick diagnostics and field fixes that get you back shooting fast.
Signal dropout and missed exposures
Loose plugs, RF interference, or tiny wireless remotes sliding off the tripod are often the culprit.
Timing mismatches and camera sleep
Gaps appear when camera auto‑power‑off or sleep mode interrupts sequences.
Truncated exposures & firmware quirks
Some cameras reset counters or ignore long bulb commands after firmware bugs.
Battery and power management
Cold and long runs kill batteries faster.
Quick field kit checklist
A 5‑minute preflight test sequence and these small fixes will save you the grief of discovering hours of missed data only at dawn.
Advanced Tips: Automating Sequences, Integrating with Star Trackers, and Remote Monitoring
Automating multi-stage sequences
Scale sequences by chaining steps: start with a wide-field timelapse, then switch to long deep-sky exposures, and finish with darks/biases automatically. Use software like N.I.N.A., Sequence Generator Pro (SGP), or AstroPhotography Tool (APT) to build a queue that inserts calibration frames at set temperature or interval thresholds. Example workflow:
Integrating intervalometers with mounts and trackers
Synchronize triggers with equatorial mounts (Sky‑Watcher EQ6‑R, iOptron CEM series) so exposures start only after guiding or dithering events complete. Use PHD2 for guiding and enable “dither after each frame” in SGP/NINA; the software sends commands to the mount then fires the shutter when motion settles. For hardware dithering/delays, Pegasus Astro and onboard mount handlers can accept trigger pulses from intervalometers (e.g., external shutter out).
Conditional sequencing, plate-solving, and scripts
Automate decisions with plate‑solving and scripting:
Remote monitoring and safety
Live review keeps data healthy: tether via CamRanger, ZWO ASIAIR, or Ethernet tethering to a laptop for preview, histograms, and frame download. Use remote power controllers (Pegasus Astro UPB, smart plugs) and UPSes, enable automatic roof closure, and fit dew heaters with current monitoring. For safety:
These advanced integrations let you run complex, resilient night sessions remotely — next, tie all this together in the article’s closing thoughts.
Bring the Night Sky Into Focus with Smarter Triggering
Remote shutters and intervalometers transform night-sky photography by reducing vibration, enabling precise exposures, and opening creative workflows like stacking and timelapses. Start simple: test a few exposures, confirm focus, and refine intervals before committing to long sequences.
As you gain confidence, adopt automation, integrate with trackers, and automate sequences for consistent, repeatable results. Always test gear and conserve power in the field—carry spares and monitor batteries—to ensure sessions finish strong. Experiment, iterate, and let smarter triggering reveal sharper, cleaner, more compelling views of the cosmos. Get out there and shoot tonight.


Great article — really cleared up why a remote shutter matters for night shots. I’ve been using a Pixel TW-283 E3 Wireless Multi-Camera Remote with my mirrorless and it cut down micro-vibration a ton. Curious if anyone has paired that remote with a Sky-Watcher Star Adventurer 2i Pro tracker? I worry about timing offsets when the tracker is moving — do you set longer exposures and rely more on stacking, or sync the intervalometer tightly?
Also, small note: the section on bulb ramping was the most useful for me. Thanks!
Also check for firmware updates on the tracker — mine improved sync stability after an update. 🙂
Thanks for the kind words, Maya. With a Star Adventurer tracker you usually shorten single exposure times to reduce streaking and then stack. If the tracker is accurate and polar-aligned well, you can push single exposures longer — but I still recommend syncing the intervalometer to the tracker start (use a short delay between mount movement and exposure).
I’ve done exactly that: Pixel TW-283 + Star Adventurer. Set exposures to 60–120s depending on focal length, then stack. For timelapses, add a 1–2s delay after the mount moves before triggering to avoid wobble.
Solid breakdown on intervalometers. I own the JJC Intervalometer Timer Remote for Canon DSLRs and the article’s explanation of interval settings and bulb ramping helped me get smoother timelapses. One small gripe: could use a couple more example presets (like for 30s exposures at f/2.8 vs 120s at f/4).
Agree on presets. I keep three profiles on my JJC: 20s@f/2.8 for wide, 60s@f/2.8 for mid, and 120s@f/4 when tracking. Works well for my workflow.
Good suggestion, Carlos — adding a presets table is a great idea. For a quick rule of thumb: shorter focal lengths = longer exposure per frame before star trailing; for timelapses, aim for consistent exposure and use bulb ramping to handle sky brightness changes.
Nice write-up on integrating trackers. I have the Sky-Watcher Star Adventurer 2i Pro Portable Tracker and want to sync it with a wireless remote for timelapses. Any tips on getting the tracker to ‘speak’ with the camera timing-wise? I assume you start the intervalometer after the tracker finishes its periodic correction?
If you’re doing long exposure single frames (not stacking), polar align well and reduce exposure length. For stacks, shorter frames + stacking is more forgiving with minor mount errors.
Start the tracker, let it settle for a moment after any periodic error correction or slew, then start the intervalometer. If your tracker supports an external trigger out or sleep mode, coordinate those, but generally a 1–3s buffer after the tracker starts is enough.
I add a 2s delay to the intervalometer to be safe. Also make sure the tracker’s RA motor is engaged before the first frame.
Good tip, Hannah. Also note mount balancing: a poorly balanced rig can introduce tiny movements even when tracking, so balance carefully before starting.
Quick dumb question from a newbie: can I use the zttopo smartphone shutter to trigger my DSLR via an adapter? I saw the cheap packs and thought ‘yep, instant remote’ but maybe I misread 🤦♀️
Also lol i have typos cause it’s late and the moon is lovely tonight 😅🌕
Short answer: usually no. zttopo smartphone remotes are made for phones (Bluetooth) and not for direct DSLR triggering unless the manufacturer specifically lists camera compatibility or you use an intermediary (like a phone app that controls the camera via Wi‑Fi). Better to buy a remote that lists your camera model or a universal wired/RF remote.
If you want, tell us your camera model and we can suggest a compatible, budget-friendly option from the product list or alternatives.
If your DSLR supports Wi-Fi remote shooting via its app, your phone could control it — but that’s different from cheap Bluetooth shutter remotes which only simulate phone camera input.
Quick question: the section on troubleshooting mentions signal loss with Wireless Radio Remote Shutter for Canon Cameras. Anyone experienced dropouts at 30m? I’m trying to set up a remote for a group shoot and don’t trust the signal beyond 10–15m in the field.
I tested mine and got flaky performance past 12–15m near trees. On an open beach it was fine at 25–30m. Depends on surroundings.
Range claims are often optimistic. RF remotes can work at 30m in open fields but nearby electronics, trees, or line-of-sight obstructions matter. For reliability at distance, test in the location beforehand or use a wired solution if practical.
This guide is a keeper. Love the ‘minimizing vibration’ section — beanbags, mirror lockup, and remote triggering all do wonders. I’d add that when mounting the Pixel TW-283 or any wireless receiver directly on the hot shoe, you should still avoid touching the camera after arming. Even slight pressure transfers.
Also, if you’re trying to squeeze more life from your batteries: turn off live view between exposures and dim the camera screen where possible. Game changer.
Thanks for the practical tips!
Agree about the hot shoe — sometimes I mount the receiver on a small cold shoe extension to reduce handling risk.
Excellent additions, Sophie. Turning off live view and dimming the display are two often-overlooked battery savers. We’ll add a short checklist for field battery management.
Good tip, Oliver. Adding that to the mounting suggestions.
Totally — I carry 2 spare batteries and a power bank for longer sessions. Live view kills you fast if you’re shooting long sequences.
Loved the article but… the zttopo Wireless Smartphone Camera Shutter Remote (2-Pack) section made me lol. Bought one, spent an hour pairing, then realized one of the pair was for a friend’s phone and wouldn’t talk to my camera 😂
Is there a standard way to verify compatibility before buying? The app-controlled vs RF confusion needs more emphasis — I nearly returned mine.
If it’s Bluetooth, check if the app supports your phone model and if your camera has a shutter-over-Bluetooth feature. If not, you need a wired or RF solution.
Pro tip: read the Q&A on the Amazon listing — people often ask exactly which models work. Saved me from a bad purchase once.
Haha, that’s a common mix-up. zttopo remotes are mostly Bluetooth shutter remotes for phones, not full RF camera remotes. For cameras, look for remotes that explicitly list your camera model or use a physical connector. We’ll clarify that in the compatibility section.
Thanks for the feedback, Nora. We’ll add clearer compatibility checks and a quick decision flow for wired vs wireless vs app.
Really appreciated the shooting strategies section — especially stacking vs long exposures. I’m trying to automate a sequence with my Canon and JJC Intervalometer but getting inconsistent gaps (timing errors). I followed the article’s troubleshooting tips (check camera sleep, intervalometer delay), but still get a 1–2s jitter every 50 frames.
Has anyone found a reliable sequence to eliminate that? Is the camera TTL/processing the bottleneck, or the intervalometer hardware?
Those micro-jitters are often due to the camera doing in-between-frame processing (writing to card, noise reduction). Try shorter exposures + longer interval to let the camera finish writing, or use a faster card/buffer if available. Some intervalometers also have a slight timing drift; swapping units can reveal if it’s hardware-related.
Also try manual mode with a fixed exposure and no in-camera stacking features running. That removes a lot of hidden delays.
I solved this by disabling long-exposure noise reduction and letting the RAWs have the noise. Also upgraded to a UHS-II card — the buffer clear time dropped dramatically.
Lol I once set up an intervalometer and forgot to disable the auto power-off on my camera. 200 frames later and a sad, dead camera 😂
Serious Q: for app-controlled remotes, does anyone worry about phone battery dying mid-run? Is there a recommended backup plan?
Phone battery is a legitimate risk. Best practice: keep the phone plugged into a power bank, or use a small external battery that powers the phone throughout. Alternatively, use a dedicated RF/wired remote for long runs to avoid phone dependency.
I carry a cheap USB battery pack and a tiny solar charger in summer — saved me twice. Also set phone to airplane mode except for the Bluetooth if the remote needs it.