Why Take Microscopy Outdoors?
Taking microscopy into the field opens a world of hidden life and immediate discovery. Portable microscopes let you examine microhabitats where organisms actually live — on leaves, in soil, in pond water, and on rock surfaces. This direct access speeds up in‑situ diagnostics, helps with rapid identification, and reveals behaviors and interactions that are lost in lab samples. It also strengthens ecological surveys and biodiversity inventories by adding fine-scale data.
Field microscopy is empowering for educators, students, and citizen scientists. With the right approach you can collect reliable observations, troubleshoot on the spot, and record useful data under real conditions. This guide gives practical advice on choosing gear, packing smartly, preparing samples outdoors, optimizing views in tough conditions, and managing your field records. It also covers maintenance and ethical considerations so your work is responsible and repeatable.


Wild M8 Stereo Microscope (4760E SCOPE) — High-Detail Macro View
Selecting the Right Portable Microscope for Fieldwork
Optical vs. Digital: pick by task
Optical (eyepiece) microscopes and digital microscopes each shine in the field. Stereo/low‑power optical scopes (10–80×) are ideal for entomology and botanicals—you can manipulate specimens while watching. Compound or digital scopes that reach 100–400× are better for cell‑level water‑quality checks. Digital units with integrated sensors simplify documentation and sharing, but optical scopes often give faster, battery‑free viewing.
Magnification, objectives, and practical limits
Choose magnification for the question, not the number. Typical useful ranges:
Fixed objectives are simple and rugged; interchangeable objectives add flexibility but increase fragility.
Illumination, power, and ruggedness
LED illumination is the field standard—bright, low‑power, and long‑lasting. Look for adjustable dimming and diffusers to avoid glare. Battery life of 6–8+ hours is a practical baseline; USB‑C charging and compatibility with power banks or small solar panels make long trips feasible. For wet/sandy sites, aim for devices with IP54 or higher (IP65–IP67 if you expect heavy spray/submersion).
Size, connectivity, and real‑world matches
Weight matters: pocket scopes and lightweight stereo microscopes (<1–2 kg) are easier to use on transects. Connectivity choices:
Examples: Foldscope (ultralight, low cost), Celestron/National Geographic handheld digital microscopes for classroom/field documentation, and rugged stereoscopes from AmScope for heavier fieldwork.
Use‑case checklist (non‑negotiables)
Next up: practical field preparation—how to pack, protect, and power your chosen microscope for a day (or week) in the wild.
Field Preparation: Packing, Power, and Protection
Smart packing and rugged cases
Start by modularizing gear into mission packs: optics, power, consumables, and documentation. Hard cases like Pelican 1200 or Nanuk 910 protect instruments from drops and water; use foam cutouts for microscopes and slide trays so everything has a home. For lightweight day trips, a padded camera-style bag with removable inserts (Lowepro, Think Tank) keeps access quick on transects.
Packing checklist:
Protective accessories and spare parts
Bring lens caps, dust covers, shock mounts (silicone tube or foam), and a small roll of gaffer tape for emergency mounting. Spare consumables can save a ruined session.
Spare-parts list:
Power planning: estimate, choose, conserve
Estimate needs by multiplying device wattage by hours in field; many handheld/digital microscopes use 2–5 W—so a 10-hour day needs roughly 20–50 Wh. Choose battery banks rated in Wh for easier math: an Anker PowerCore 20000 (~74 Wh) vs. higher-capacity units for multi-day work. Solar chargers (Goal Zero Nomad, BigBlue 28W) are great for long stints; combine a solar panel with a battery bank to buffer cloudy days. Conserve power by dimming LEDs, disabling wireless streaming, batch-capturing images, and shutting devices between samples.
Field cleaning and environmental protections
A compact cleaning kit—blower (Giottos Rocket), lens pen, microfiber, ethanol wipes, and cotton swabs—handles most messes. In humid climates pack silica gel packs and airtight bags; in sandy or wet areas use dry bags and waterproof case liners. For temperature extremes, keep batteries insulated close to your body to preserve capacity in cold, and shade electronics from direct sun to avoid overheating. A simple reflective pouch or insulated box can make a measurable difference on long days.
Sampling Protocols and Sample Preparation Outdoors
Collecting representative samples (step-by-step)
Start with a clear question: what are you comparing and how many replicates you need? Work upstream-to-downstream (or edge-to-center) to avoid cross-contamination. Typical quick protocol for a pond visit:
- Rinse tools in source water before first sample, then use clean tools for each site.
- Collect multiple small subsamples (3–5) and combine or keep separate for replicates.
- Note GPS, time, weather, and any visible disturbance in your field notebook immediately.
A short real-world tip: on a busy stream survey, switching gloves between sites and changing pipettes cut false positives I’d seen from upstream algae.
Tools to carry
Labeling and chain-of-custody
Use preprinted barcode labels, waterproof Sharpies, and a simple ID scheme (site-date-serial). Log handler name, time, preservation method, and intended analyses (microscopy, molecular). For formal surveys, staple a paper chain-of-custody sheet to the outer case.
Quick fixation and transport
Rapid prep for portable microscopes
Wet mount: place a drop of sample on a slide, cover with a coverslip, blot excess. Pollen slides: glycerin jelly or lacto-phenol (pre-prep) helps visibility. Temporary stains: dilute methylene blue or iodine for contrast. Immobilization: cool samples or use 1% methylcellulose prepared in advance to slow swimmers.
Safety and biosecurity
Wear gloves, avoid releasing non-native organisms, disinfect tools with 10% bleach between sites, and follow local regulations for hazardous or protected species.
Optimizing Observations in Challenging Field Conditions
Field microscopy often means wresting useful images from changing light, wind, and small workspaces. These practical tricks help you get crisp, reproducible observations when conditions are anything but ideal.
Stabilizing on uneven terrain
Give your scope a firm platform:
Controlling glare and lighting
Soft, even illumination beats harsh shadows.
Contrast techniques for simple devices
You don’t need a phase-contrast turret to boost detail:
Thermal drift, condensation, and ergonomics
Fast subjects and imaging tips
Next up: practical troubleshooting, routine maintenance, and ethical field practices to keep your gear and data reliable.

Recording, Annotating, and Managing Field Data
Good field data starts at capture. Think like a curator: every image needs a story attached.
Camera settings and image formats
Lock exposure and white balance when possible; use manual focus or focus stacking for depth. Recommended settings:
In-field annotation practices
Fast, consistent notes save hours later. Combine methods:
Essential metadata structure
Adopt a simple schema and stick to it. Core fields:
Syncing, backups, and tools
Use Wi‑Fi microscopes or phone adapters (Celestron Wi‑Fi units, phone-to-eyepiece mounts) to transfer images to a phone/tablet. Sync to cloud services (Dropbox, Google Drive, OneDrive) when online. For robust offline backups:
Basic quality control and workflow
Quick QC: open each image in the field to check focus, exposure, and scale. Rename files immediately using your naming convention. At day’s end, copy data to two devices and update your master index. A short habit—consistent names and a one-line voice note per sample—prevents the common headache of “mystery images” later.
Troubleshooting, Maintenance, and Ethical Considerations
A compact primer to keep your kit working and your fieldwork responsible — practical fixes, upkeep, and the do-no-harm rules that matter when you take microscopy beyond the lab.
Common problems and quick fixes
Frequent field headaches and what to try first:
Routine and longer-term maintenance
Small rituals pay off:

Ethical field practices and biosecurity
Protect sites and communities:
Training and reproducible protocols
Document checklists, run mock field days, and cross‑train team members on cleaning, data entry, and contamination control so your methods are reproducible and resilient. With these practices in place, you’re ready to synthesize lessons and plan next steps in the Conclusion.
Bringing Microscopy to the Field: Next Steps
Careful selection, preparation, and rigorous documentation turn a portable microscope from a novelty into a reliable field tool. Start small with pilot trials, iterate your sampling and power plans, and build a compact starter kit tailored to your objectives. Practice under real conditions until workflows are smooth and reproducible.
Collaborate with local experts, integrate field microscopy into monitoring or educational programs, and share findings on community science platforms to amplify impact. Your observations contribute to broader knowledge and improve protocols for others. Take the first step: run a short pilot, assemble your kit, and upload your initial records — then refine, repeat, and grow. Celebrate small wins and regularly document lessons learned each trip.


Great piece. Quick question about the Troubleshooting, Maintenance, and Ethical Considerations section:
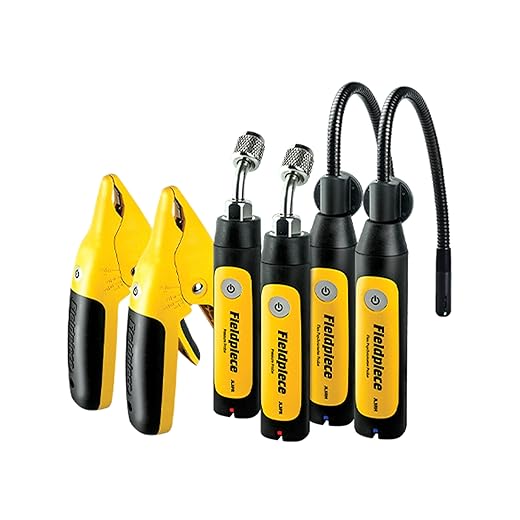
Do you have a recommended workflow for obtaining permits or notifying land managers before sampling? I do mostly community science stuff and want to be sure I’m not stepping on toes. Also, is the Fieldpiece Job Link Wireless HVACR Probe Kit really necessary for most projects, or just for specialized ones?
For community projects, consider using public data platforms (iNaturalist) and tag the land manager if you reached out — transparency helps.
Good questions, Noah. For permits: start with the landowner/manager (park office, forest service, private owner). For most low-impact community science (non-destructive photos, non-collecting), a heads-up is often enough. For taking samples, even small ones, ask — many places have simple research permit forms.
Regarding the Fieldpiece kit: it’s optional. Use it when you need precise microclimate metadata (temp/humidity at time of sample). For casual ID outings, a phone app and a shaded temp reading are usually sufficient.
Seconding admin — local universities or extension offices are also good resources to find out permit needs. I once got a one-page permit signed in a week for a small study.
Carson MicroBrite 60x–120x LED Pocket Microscope = backyard hero. Cheap, quick, and perfect for showing my niece a bug’s eyeball 😂
Not going to replace my digital rig, but unbeatable for spontaneous field stops.
Totally — Carson is great for quick ID and outreach. For documentation or publication-quality images, pair it with a smartphone adapter or use the Portable 500x for higher-res captures.
Yep — also use the Altura cleaning kit before handing it to kids. Little fingerprints smear everything in seconds.
Helpful article, but wanted to call out battery life on the Rechargeable 1000x Pocket Microscope with Slides Kit — mine drains faster when I use the LED and the higher magnifications.
Also the Rugged 42800mAh Solar Power Bank is AWESOME capacity-wise but kinda heavy if you’re hiking>
On a different note: Fieldpiece Job Link Wireless HVACR Probe Kit mentioned in the list — is that mainly for measuring ambient conditions? Seems a bit overkill unless you’re monitoring microclimates.
Anyone else find rechargable microscopes fragile in wet conditions? I might be doing something wrong 🤔
I carry a small waterproof dry bag for electronics and a silica gel pack to cut humidity. Also, letting the microscope acclimate to outside temps for 10–15 minutes reduces fogging.
And one more tip: if you expect rain, pack the Altura cleaning wipes and a lens pen in a zip-lock. Wiping carefully prevents scratches and keeps optics clear in humid weather.
Weight complains noted 😂 — I traded the giant solar brick for two smaller 20k mAh banks and a tiny foldable panel. Lighter on the trail, still enough for weekend trips.
Good observations, Lily. For the 1000x pocket units: lower the LED intensity and limit live-view time — capture stills instead. For long hikes consider the solar bank as basecamp power and a smaller power bank on your person.
The Fieldpiece kit is suggested for teams who need precise temp/humidity readings tied to samples; it’s optional for casual sampling but excellent for calibrated datasets.
Long post incoming because I nerd out on sampling protocols:
1) If you’re using the Rechargeable 1000x Pocket Microscope with Slides Kit, pre-label slides at home. Saves a ton of headache in the field.
2) For power: the Rugged 42800mAh Solar Power Bank is fantastic for multi-day surveys, but bring a small daily power bank in your daypack so you don’t have to unzip the big one every 10 minutes.
3) Recording & annotating: I use a phone for quick snaps + a waterproof notebook for notes — take a photo of the page after each transect so you have a digital backup.
4) The Altura Photo Complete cleaning kit is underrated — clean lenses between samples to avoid cross-contamination.
5) Ethical note: always check the site’s permit rules. Even tiny samples can matter for sensitive sites. Also, leave no trace: pack out used gloves, slides, anything you brought.
Hope this helps — been doing field microscopy for a few seasons and still learning!
Love the alphanumeric code tip — sounds like a secret spy project lol. Also, bring snacks. Field work + microscopy = hangry mistakes.
Comma tent lanterns are clutch when you’re trying to annotate in the dark but want to avoid headlamp glare on slides. Also, the solar bank doubles as a paperweight.
Quick q: when you say permits — city parks vs state parks — is it usually different? I keep assuming small samples are okay but maybe I’m wrong.
This is excellent, Maya — thanks for the checklist. Pre-labelling and photographing notes are two habits we always recommend in the article. For sample IDs we also like a short alphanumeric code (site-date-transect) to avoid ambiguity.
On contamination: I started carrying a small pack of disposable transfer pipettes. Cheaper and lighter than replacing a messed-up slide.
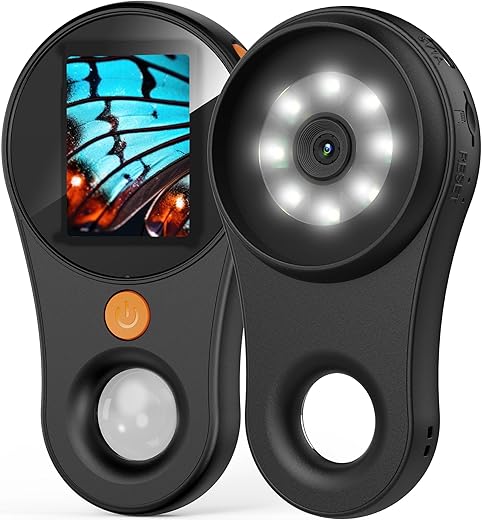
Loved the practical tips — took my Portable 500x Digital Microscope out last weekend and it was a game-changer.
Packing note: the Rugged 42800mAh Solar Power Bank kept everything alive for two days of heavy use (and yes, I forgot an extra SD card 🙃).
Also, the Ultra-Light Rechargeable 4-Pack Comma Tent Lanterns are great at basecamp for annotating printed forms after dusk.
One small gripe: the 2-inch screen on the scope is a bit tight for group viewing, but totally doable for solo work. Definitely worth it for field ops!
Agree on the tiny screen — I carry a cheap HDMI adapter for instant hookups to a small monitor. Pro tip: bring extra SD cards and label them with masking tape right away.
Nice! The Altura Photo cleaning kit is a lifesaver — cleaned smudges right off the optics after a dusty transect. Also, bring spare zip bags for slides so you don’t mix samples.
Thanks for sharing, Ethan — love hearing real-world trials. For group viewing I usually mirror the footage to a tablet/phone when possible (or use the 1000x pocket unit to capture images and share). The solar bank you mentioned is bulky but excellent for long trips; sandwich it between dry clothes to avoid scratches.