
Why Measure Binocular Magnification and Objective Diameter?
I know binocular specs can be confusing; this guide helps you verify true magnification, measure effective objective diameter, and check exit pupil practically and safely, so you can trust performance, avoid marketing hype, and get the best viewing results now.
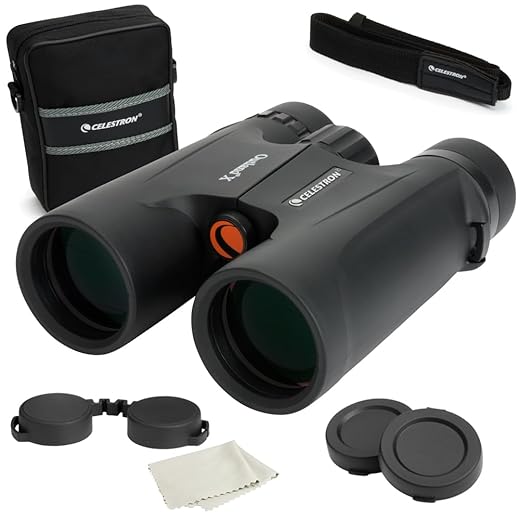
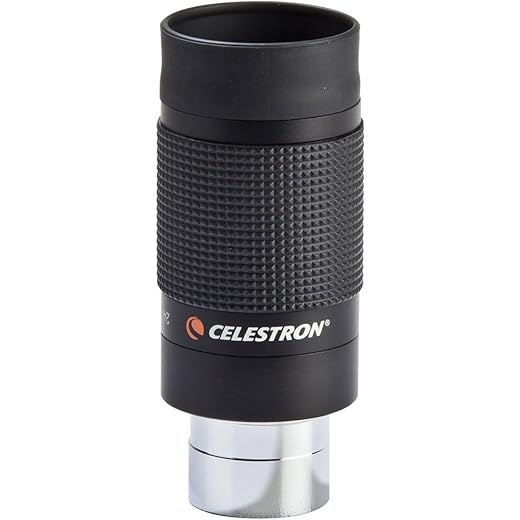
What You’ll Need

Mastering Binoculars: Magnification
Step 1 — Read the Label, Then Doubt It
Manufacturer specs are a starting point — but do they match reality? Let’s verify.Locate the printed specs on the binocular body or box (for example: 8×42). Note the claimed magnification and objective diameter.
Explain the numbers quickly: magnification is nominally the ratio of the objective focal length to the eyepiece focal length (i.e., objective_f / eyepiece_f). Objective diameter means the clear front-lens aperture in millimetres — not the outer housing size or rubber armour thickness.
Make quick notes and examples:
Record the printed values and set a verification plan: measure focal lengths where possible, then independently measure objective aperture and exit pupil to confirm true magnification.
Step 2 — Measure Eyepiece Focal Length (Easily and Safely)
Want a surprisingly simple trick? Use distant objects and a white card — no dismantling required.Aim the binocular (or a single eyepiece held in a tube) at a distant high‑contrast target (≥50 m) or the horizon. Hold a white card or sheet behind the eyepiece and slowly move it until the image on the card is sharply focused; the distance from the eyepiece’s outer lens to the focused image approximates the eyepiece focal length.
For greater accuracy, remove a modular eyepiece, project a collimated beam (distant tree, streetlight or a collimator) onto a screen and measure the back focal distance to the image. Avoid pointing at the Sun.
Record the measured eyepiece focal length in millimetres, and repeat the measurement 2–3 times, averaging the results to reduce error.
Step 3 — Measure Objective Focal Length (Practical Methods)
You don’t need a lab — here’s how to get objective focal length in everyday conditions.Use the distant-object method: point the objective at a very distant bright object (for example, sunlight reflected off a building or a distant streetlight at night) and project the focused image onto a white card held behind the objective. Do NOT project the sun directly. Move the card until the image is sharp.
Remove the objective cell if possible for a clearer measurement. Alternatively, mount the objective in a simple lens bench: fix the lens, aim at a distant target, find the image on a screen, and measure the spacing.
Step 4 — Calculate True Magnification
Forget marketing — compute magnification yourself and watch myths fall apart.Calculate the magnification using the simple formula: M ≈ Fo / Fe. Use the averaged objective focal length (Fo) and eyepiece focal length (Fe) you measured in Steps 2 and 3. For example, Fo = 200 mm and Fe = 10 mm → M = 20×.
Check your math with an empirical test. Try one of these quick methods:
If calculated and empirical magnifications differ by more than 10%, re-measure Fo/Fe and consider internal stops or field lenses altering effective focal lengths.

Step 5 — Measure Objective Diameter (What Really Matters)
Housing size isn’t the same as clear aperture — here’s how to find the real light-gathering area.Measure the outside of the objective cell with a caliper. Note that the cell OD is NOT always the clear aperture.
Shine a bright, diffuse LED or torch into the front of the objective. At the rear focal plane or through the eyepiece, project the emergent pupil onto a white card and measure its diameter — that is the clear aperture. For example, a caliper reading of 50.4 mm but a projected pupil of 48.5 mm shows ~1.9 mm lost to cell walls or baffling.
Alternatively, remove the objective cell or use a cardboard mask with an adjustable hole. Increase the hole until vignetting just disappears; that hole diameter approximates the effective objective diameter.
For a non‑invasive check, measure the exit pupil (Step 6) and compute objective ≈ exit pupil × magnification.
Record both physical and effective aperture measurements and note any discrepancies due to internal baffles or coatings.

Step 6 — Measure Exit Pupil and Verify Everything
The exit pupil tells the whole story — measure it and reconcile numbers for a final verdict.Set the binoculars to the widest field. Hold a white card just behind an eyepiece and illuminate the objective with a bright torch so a circular bright spot (the exit pupil) forms on the card. Measure that spot diameter with a ruler or caliper — that is the exit pupil.
Compute the expected value: Exit pupil = objective diameter ÷ magnification. Use your measured magnification and objective diameter to calculate the expected exit pupil and compare it to the direct measurement.
For example: objective 50 mm ÷ 8× = 6.25 mm expected; measured 6.0 mm → ~4% difference.
Log these items:
If values diverge significantly, repeat measurements, test other focal settings, or consult the manufacturer.

Record, Compare, and Enjoy Better Optics
Record your verified magnification and effective objective diameter, note any label discrepancies, then use those facts to select appropriate eye relief, filters or mounting accessories — or pursue warranty service if needed. Try the steps, share your measurements, join in.


Great guide — super practical. I especially liked Step 1: “Read the label, then doubt it.” 😂
I tried the eyepiece focal length method (Step 2) using a cheap laser pointer and a ruler; results were surprisingly consistent. One question: when measuring objective focal length by projecting onto a wall (Step 3), how dark does the room need to be for accurate results?
I do mine at dusk instead of full dark. Enough contrast to see the focus but not pitch black — makes it easier to position everything without bumping into furniture.
If you’re getting inconsistent results, try moving the paper a bit and take several measurements then average them. That helped me reduce scatter.
Glad it helped, Emma! For projecting the objective’s focus you want the room as dark as possible — streetlight leakage can shift your apparent focus. A dim room with blackout curtains usually does the trick. Also try using a piece of white paper a few meters away to get a sharper image.
Small nitpick: Step 3 mentions a few practical methods for measuring objective focal length, but the camera-based method instructions were a bit vague. Any tips for lens-to-camera distance when using a DSLR?
I found it helpful to tape a meter stick to the bench and note the distance from the objective housing to the sensor plane (or lens mount) to get consistent readings.
Good point. For DSLR method, use live-view and a zoomed-in focus assist. Start with the objective roughly at the camera’s hyperfocal range for a distant target, then adjust until a background target comes to a sharp focus through the objective. Measure lens-to-sensor distance then. We’ll expand that section.
This guide is dense in a good way. One suggestion: maybe add a short FAQ for common misconceptions (e.g., labeled magnification vs true magnification, how coatings affect brightness). Would make it friendlier for beginners.
Thanks, Lucas — a FAQ is a great idea and would help clarify common points. We’ll draft one that covers those exact misconceptions.
Agree, FAQs save time. Also add a quick glossary for terms like ‘exit pupil’ and ‘eye relief’ for new folks.
Loved the section on exit pupil (Step 6) — measuring that fixed a lot of my night-sky complaints. Didn’t realize a tiny exit pupil could make things feel dim even if magnification is high.
Also — little note: if you wear glasses, account for eye relief when checking exit pupil placement.
Yup, I measured my exit pupil and realized my 42mm objectives were producing a 3mm exit pupil at 14x — no wonder stars looked faint.
Exactly — exit pupil and eye relief interplay a lot with perceived brightness and comfort. Glad that section was useful. Good point about glasses; many forget that.
Made me laugh: “Read the label, then doubt it.” That’s my life motto when buying gear 😂
Also, for anyone measuring exit pupil, don’t forget to account for interpupillary distance — especially if you share binos with someone else.
Sharing binos with kids is a nightmare for IPD. I usually mark a comfy setting and note it in my spreadsheet for quick swaps.
Ha — we should put that motto on a sticker. Good reminder about IPD; it can affect perceived overlap of exit pupils and comfort.
This is oddly satisfying. Followed Steps 2–4 and ended up with a new appreciation for my old binos. Also learned to distrust flashy numbers on the box. 😌
Glad they gave your old binos a new lease on life. It’s nice when a cheap pair performs better than expected after measuring.
Same here — I thought upgrading was due, but my measurements suggested otherwise. Saved $$$.
A couple of constructive notes:
1) The objective diameter part (Step 5) could use a bit more on how to handle multicoated vs. uncoated optics — does coating affect effective diameter or just transmission?
2) Maybe add a troubleshooting checklist for when measurements disagree wildly.
Overall very useful though!
Also mention how dust or internal haze can lower effective performance even if diameter measures fine. Cleaning and inspection tips would be helpful.
Thanks, Ethan — good suggestions. Coatings won’t change physical diameter but do affect light throughput, so an effective brightness comparison might make coatings relevant. We’ll add a troubleshooting checklist in the next revision.
Agree on coatings. You could add a simple transmission/brightness test with a neutral gray card to compare optics of similar diameters.
Super thorough! I got weird numbers at first because I forgot to account for the eyecup thickness when measuring eyepiece focal length. If you’re doing this at home, remove flexible eyecups or keep notes about them.
Also: be patient. Optical measurements rarely go perfectly on the first try.
Excellent practical note, Sophia. Eyecups and adapters can shift reference planes; documenting every accessory used during measurement is important.
Yep — I once lost an hour chasing a discrepancy before realizing I had a slip-on sunshade attached. Rookie mistake 😅
Patience and a checklist. Someone should make a printable checklist for these steps — maybe the author will include one!
So the formula in Step 4 (magnification = objective focal length / eyepiece focal length) — that’s the true one, right? I always assumed magnification was whatever the big number stamped on the binos says. Kinda annoyed that’s often wrong.
Yes, that’s the optical definition for simple systems: M = f_obj / f_eyepiece. Labels can be marketing-driven or rounded. Measuring gives you the actual performance — and it explains why some ‘8x’ binos feel like 10x or 6x.
You nailed it, Daniel. I measured a ’10x’ pair that was actually 11.2x — felt like cheating lol.
Question: when measuring objective diameter in Step 5, do you measure the outer barrel opening or the clear aperture (glass inside)? Seems like that could change reported values.
If you can’t access the glass edge, try shining a collimated light and observing the illuminated area — that’ll give you the effective clear aperture.
Great question — measure the clear glass aperture (the effective lens diameter) not the outer barrel. Manufacturers sometimes list the physical barrel size, which can be misleading.
Yeah, I used calipers on the glass edge where possible. Barrel size is almost always larger than the usable optical diameter.
I tried the record-and-compare step last weekend. Made a spreadsheet with eyepiece focal lengths and objective diameters — what a difference between labeled and measured magnification. I think manufacturers sometimes round in their favor 😅
I’ll upload a template tomorrow and post it here — simple columns: model, labeled mag, measured mag, f_e, f_o, obj dia, exit pupil, notes.
A spreadsheet is exactly what we hoped readers would use — great approach. Rounding is common, and in some cases tolerance stack-ups in the optical path explain differences too.
Care to share a blank spreadsheet template? Would save me time setting one up.
For people attempting these measurements without fancy gear: try the shadow method for objective diameter (Step 5). Hold a piece of paper behind the objective and shine a strong light — measure the shadow diameter. Not perfect but good enough for hobbyists.
Nice DIY tip, Isabella. The shadow method is low-tech but effective for most practical purposes.
Pro tip: do several shots and average. Paper can wrinkle and light angle matters.
I’ve used the shadow trick and then calipers on the paper circle — surprisingly accurate to within a millimeter or two if you keep things flat.
Nice writeup. Quick practical tip: when measuring eyepiece focal length (Step 2), clamp the eyepiece in a small holder so it doesn’t move when you adjust the screen. Saved me a lot of headaches.
Also wrap a rubber band to dampen micro-vibrations if you’re using a long focal length eyepiece setup.
Smart tip, Jacob. Stability makes a big difference. A little foam or a camera tripod adapter can keep things steady.
Do you use some kind of collimator to align things? I tried freehand and the beam was slightly off-center every time.