This step-by-step guide will teach you how to properly clean and care for your tinted sunglasses. It will provide you with easy-to-follow instructions on how ...

This step-by-step guide provides instructions on how to clean and maintain mirrored sunglasses. It highlights the importance of proper care for longevity and ...
Are your eyes easily irritated by bright sunlight? Do you find it difficult to find a pair of sunglasses that not only protect your eyes but also provide the ...
Picture this: the sun glistening on the crystal-clear waves, the invigorating breeze caressing your face, and the exhilarating feeling of gliding across the ...

Have you ever anxiously watched your little one play under the scorching sun, worrying about their delicate eyes? As parents, we share the same concern. That's ...

Picture yourself on a sunny day, ready to hit the beach or explore the city streets. You want to look stylish, but also need reliable eye protection. That's ...

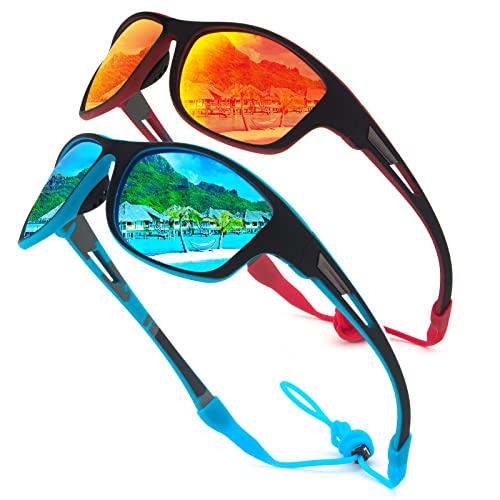
Welcome to our review of the Polarized Floating Sports Sunglasses - Unisex! If you're in search of the perfect combination of performance and style for your ...

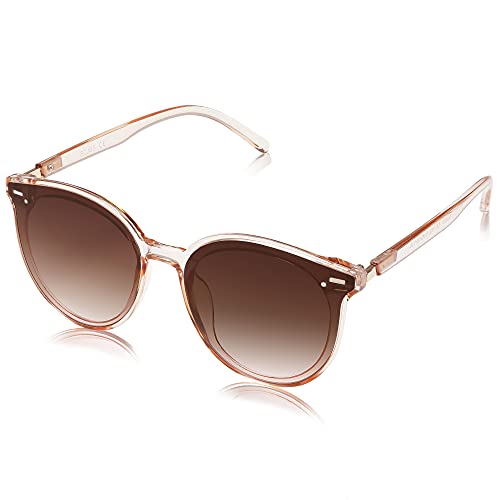
In this blog post, we will be exploring the remarkable features and remarkable style of the Sojos SJ1127 Cateye Sunglasses. With their seamless blend of ...

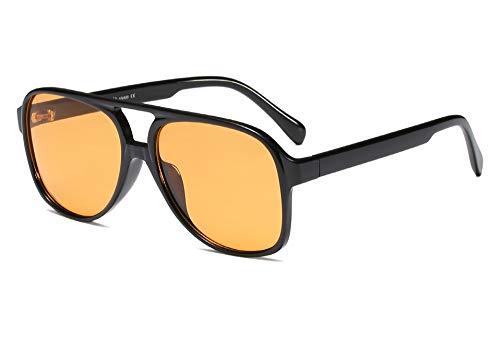
Travel back in time and embrace the spirit of the 60s with our Retro Hippie Rectangle Sunglasses. Designed to transport you to a vibrant era, these sunglasses ...

In a world full of bright sunshine, protecting your child's eyes becomes a top priority. With summer fast approaching, finding the perfect sunglasses for your ...
Thanks for the catch, Jacob — fixed! And yeah, real-world ergonomics matter. Exit pupil is only useful if you can actually use the gear comfortably.
Absolutely — 50mm is great for wide-field DSOs and Milky Way panels. On crop bodies it gives tighter framing; on full-frame it’s a classic focal length for landscapes + Milky Way. Use faster aperture if you have it and track for longer exposures.
Good catch on the typo — thanks, Claire, we’ll fix that. Also appreciate the QC note; adding a consumer checklist (hotspots, uniformity, batch labeling) is a great idea.
We’ll include recommended simple tests for detecting hotspots and coating non-uniformity in the updated Practical Impacts section.
Smart tip, Jacob. Stability makes a big difference. A little foam or a camera tripod adapter can keep things steady.
Thanks for sharing, Ethan — love hearing real-world trials. For group viewing I usually mirror the footage to a tablet/phone when possible (or use the 1000x pocket unit to capture images and share). The solar bank you mentioned is bulky but excellent for long trips; sandwich it between dry clothes to avoid scratches.
Phone battery is a legitimate risk. Best practice: keep the phone plugged into a power bank, or use a small external battery that powers the phone throughout. Alternatively, use a dedicated RF/wired remote for long runs to avoid phone dependency.
Good idea, Olivia. A printable checklist is on my to-do list. Your three bullet points are exactly what I’d include — plus a quick ‘pupil measurement method’ and a simple card test.
Good suggestion, Grace. A flowchart for common targets (planets, DSOs, birding) is a great idea — I’ll prototype one and add it to the guide.
Great questions, Sarah. For wide-field deep-sky with a DSLR I usually start with live view at 10x to get close, then fine-tune with a Bahtinov on a star when I switch to longer focal lengths. For flats: point at a uniformly lit white panel or the dawn sky, use the same aperture and sensor orientation, and take 20–30 flats to average out noise.
You’re right — hard numbers would help. Off the top of my head: many Canon DSLRs need ~55mm flange focal distance. So if your filter wheel + adapters add up to more than that without a corrective optic, you’ll be out. The Variable Extension T2 can help trim that last few mm. I’ll add a photo table in the next revision.
Great workflow notes, Sophia — we’ll consider adding a starter preset in a follow-up. Thanks for describing your kit use, that’s exactly the kind of real-world detail readers like.
Cats always know when you’re trying to be productive. Glad it worked out otherwise — upgrading to a proper adapter usually simplifies setup, but DIY is great to learn the basics.
Good point. I’ll add a note about regional availability and tips for searching equivalent models by size (e.g., 23.2mm) or keywords like ‘universal smartphone adapter eyepiece’. Thanks!
Good tip, Ethan. Folding or removing eyecups can reduce obstructions and improve alignment — just be gentle with the eyecups so you don’t damage them.
Short answer: some RF lenses are expensive, but Canon is expanding budget options and third-party makers are catching up. The R100 works well with affordable RF and RF-S options — also consider adapting older EF glass if you find good deals.
Thanks for the heads-up on typos — I’ll review that section. Happy the accessory route worked for you; often that’s the most cost-effective upgrade.
Nice DIY tip, Isabella. The shadow method is low-tech but effective for most practical purposes.
Totally — I mention a few in the article, but favorites are: Dark Site Finder or LightPollutionMap for long-term planning, and ClearOutside or MeteoBlue for cloud forecasts. Combine a light pollution map with a local weather forecast for best results.
Many younger kids appreciate a stereo scope for 3D objects because it’s more intuitive. If budget allows, a simple stereo for gross specimens + a compound for slides is a great combo.
Good question — torque order can make a surprising difference. I usually: 1) secure dovetail to mount, 2) attach camera/adapters to dovetail plate, then 3) tighten any compression rings last. For the Variable Extension T2: great for dialing in backfocus when mixing adapters/filter wheels, but it’s one more point that can introduce wobble unless it’s snug. Use threadlocker on non-moving joints if you won’t change it often.
So glad to hear that approach worked for you, Rachel. Micro-challenges are a great low-pressure way to keep kids observing consistently.
Trust me — you’re not alone. Try using a small piece of paper with a hole punched to help align the phone camera to the eyepiece. Do coarse alignment first, then fine-tune with test shots (step 6).
Good question. Re-check whenever you reassemble or move the optical tube or finderscope. If everything stays put, a quick verification once per session is usually enough. For imaging, check before important frames. If you transport the scope, always re-check alignment.
A spreadsheet is exactly what we hoped readers would use — great approach. Rounding is common, and in some cases tolerance stack-ups in the optical path explain differences too.
Softness can come from several sources: (1) eyepiece not parfocal with the objective — try switching eyepieces or adjusting focus on the microscope; (2) phone camera might be using digital zoom or autofocus hunting — set exposure/focus lock if possible; (3) slight tilt or decentering — minute shifts can blur the image. Try a tripod or clamp to stabilize the adapter.
Noted — adding annotated images or diagrams is on the to-do list. Thanks for the candid feedback!
Solid point, Liam — we did touch on stabilization and handling but could add a deeper comparison of rigs for long shoots. Thanks for the nudge!
Thanks! Some universal adapters come with extendable clamps or removable phone cradle inserts that accommodate cases. The GOSKY has a design that works with many cases, but for very bulky cases you might need to remove it or use a phone holder that attaches to the adapter rather than clipping onto the phone.
Thanks, Mia — we’ll add a mini ‘slide recipes’ section. Quick tips: for temporary mounts, water + cover slip; for longer preservation, use a few drops of glycerin or a simple sugar solution, and seal edges with nail polish for short-term storage.
Solid PSA. The article emphasizes redundancy for that reason — adhesive mounts + tethers + backups in your Neewer kit can prevent heartbreak.
Great question — measure the clear glass aperture (the effective lens diameter) not the outer barrel. Manufacturers sometimes list the physical barrel size, which can be misleading.
Yes, that’s the optical definition for simple systems: M = f_obj / f_eyepiece. Labels can be marketing-driven or rounded. Measuring gives you the actual performance — and it explains why some ‘8x’ binos feel like 10x or 6x.
Nice practical tips — marking the base is a clever trick. The spirit level idea helps with repeatability, especially on portable mounts.
Good caution — always match head/tripod ratings to your heaviest lens+body combined weight.
Appreciate that, Ethan! Love hearing about the NEEWER + VICTIV combo working in the field.
Excellent points, Noelle. We’ll expand the documentation section with a metadata checklist and suggest a basic naming convention like: YYYYMMDD_specimen_stain_mag_uniqueID (e.g., 20250902_pond_giemsa_40x_01).
Thanks Hannah — love the photo idea. Many users don’t realize how useful a quick before/after pic can be when troubleshooting.
Excellent practical note, Sophia. Eyecups and adapters can shift reference planes; documenting every accessory used during measurement is important.
MFT vs APS-C: you’ll see more noise on MFT at equal ISOs, but modern denoising and good lenses help. In low-light concert scenarios, faster lenses (lower f-number) and shooting RAW with good noise reduction will help. If you need the cleanest high-ISO, APS-C or FF is safer.
Those micro-jitters are often due to the camera doing in-between-frame processing (writing to card, noise reduction). Try shorter exposures + longer interval to let the camera finish writing, or use a faster card/buffer if available. Some intervalometers also have a slight timing drift; swapping units can reveal if it’s hardware-related.
Also try manual mode with a fixed exposure and no in-camera stacking features running. That removes a lot of hidden delays.
Noted — printable quick sheet coming soon.
Fantastic suggestions, Grace. A checklist and a troubleshooting table are great ideas — I’ll add them to the next revision. Thanks!
For vignetting, slightly increase the distance or use a different crop ratio. Also some phone cameras have lens correction settings that help.
Great detailed breakdown, Priya — the flashlight trick is a neat idea for centering! Thanks for sharing your workflow.
Thanks, Ethan — good suggestions. Coatings won’t change physical diameter but do affect light throughput, so an effective brightness comparison might make coatings relevant. We’ll add a troubleshooting checklist in the next revision.
Great point, Samir — safety tethering and redundant attachment are good field practices. I added notes about checking clips and using adhesive mounts as backups in the buying criteria section.
Glad that resonated, Sophia. Stopping down is underrated — people chase aperture but forget contrast. The white-card test is simple and underused.
And one more: for emission nebulae, don’t be afraid to selectively boost red/H-alpha but do it gently — otherwise skin-tone-like artifacts appear in galaxies.
Great to hear you got M31! For color: try stretching with care (avoid clipping highlights), use background neutralization before color balance, and consider using a color calibration frame (if your workflow/software supports it) or reference stars for white balance.
Exactly — digital coin microscopes are fantastic for demonstrations and non-slide objects. The article mentions them as a complementary tool rather than a standalone solution for cell work.
Haha, that’s a common mix-up. zttopo remotes are mostly Bluetooth shutter remotes for phones, not full RF camera remotes. For cameras, look for remotes that explicitly list your camera model or use a physical connector. We’ll clarify that in the compatibility section.
Thanks for the feedback, Nora. We’ll add clearer compatibility checks and a quick decision flow for wired vs wireless vs app.
Short answer: crop sensors give a slightly deeper DoF at the same framing/aperture because you use a shorter focal length or crop the image. So if you want similar background blur as full-frame, open up one stop (if lens allows) or use longer focal length. But subject isolation also depends on distance to subject/background.
Good idea — I’ll add a printable checklist PDF to the article soon. Meanwhile, try copying the step headings into a note app to create your own quick checklist.
Removing the case usually helps with alignment and stability. If you prefer to keep a case, a thin one is better than a bulky one. For brands, Spotting Scope Co. (example) and Gosky are popular beginner-friendly adapters — but plenty of generic models work fine. Always add a microfiber layer to prevent scratches.
Thanks for the feedback, Daniel. Good catch — we’ll add a short safety section (gloves, eye protection, proper disposal of biological materials) to the guide.
If anyone wants, drop the Amazon links you used and I’ll compare the SKUs to the ones I reference in the article.
Thanks — good catch on both counts. I’ll add a buyer’s checklist for the 230mm rail (hole pattern, slot spacing) and fix the typo in the next pass.
I’ll try to include some lightweight printable bracket examples in the follow-up — good suggestion.
Haha — afocal for convenience, DSLR for quality. The Eyeskey is great for outreach but for serious capture you want a rigid camera mount and to avoid the eyepiece as the only support. Doubling clamps on the 230mm rail is a fine workaround; the article suggests centralizing mass to minimize torque.
Excellent additions, Sophie. Turning off live view and dimming the display are two often-overlooked battery savers. We’ll add a short checklist for field battery management.
Good tip, Oliver. Adding that to the mounting suggestions.
Exactly — magnification without resolving power is just bragging rights. Glad the article conveyed that, and appreciate the reinforcement.
Glad you enjoyed it, Emily! The USB scopes are great for quick observations and sharing on a tablet, but for consistent slide work I recommend a compound scope — like the High-Power Compound Microscope 100X-2000X STEM Kit — for better stability and fine focusing.
Haha, same here — sometimes eyeballing gets you 80% of the way. But knowing the numbers helps when you switch gear or observing conditions change.
Good question, Evan. Older optics can lose several percent per surface if coatings have degraded. A rough rule: subtract 5–15% transmission for older/many-surface systems, but measure in the field if you can—your eyes will tell you more than specs alone.
Range claims are often optimistic. RF remotes can work at 30m in open fields but nearby electronics, trees, or line-of-sight obstructions matter. For reliability at distance, test in the location beforehand or use a wired solution if practical.
Great summary, Nora — your professional perspective is valuable. We tried to make the workflow tradeoffs clear; glad it landed.
Amen. Pocket action cameras are for accessible, lightweight capture — not a substitute for cinema rigs. But with good accessories and editing, you can punch above the form factor.
Exactly — quality over quantity sometimes, but enough frames to beat down noise. And yes, a good polar alignment is one of the biggest bang-for-buck improvements for tracked shots.
Noted — thanks for pushing for more practical guidance.
Excellent suggestions, Ava — we’ll add a short ethics/legal sidebar and some quick aperture/shutter tables in the next update.
Fantastic detailed share, Zoe. Imaging workflows benefit a lot from repeatability — your points on matching OTA orientation and choosing stars across both axes are exactly the kind of practical advice many miss.
Love the detailed write-up — exactly the kind of hands-on tips readers need. I’ll add a section on beginner slide prep and safe staining options suitable for hobbyists. Thanks for the suggestions!
If you want portability and solid autofocus on a budget, Tamron 70-300 is a fantastic choice. The Canon RF 75-300 is lighter and cheaper but a bit less versatile at longer reaches. Depends on how often you need longer reach vs. portability.
Haha, we briefly mentioned DIY but cautioned about true oil immersion requirements for high-power objectives — professional immersion oil has specific refractive index. Vegetable oil can help in a pinch for low-tech experiments, but clean-up is key.
Great idea — I can add a short free-tools workflow in an update. Snapseed for quick tweaks and ImageJ for stacking/measurements is a solid combo. Thanks for the suggestion!
And one more tip: if you expect rain, pack the Altura cleaning wipes and a lens pen in a zip-lock. Wiping carefully prevents scratches and keeps optics clear in humid weather.
Good observations, Lily. For the 1000x pocket units: lower the LED intensity and limit live-view time — capture stills instead. For long hikes consider the solar bank as basecamp power and a smaller power bank on your person.
The Fieldpiece kit is suggested for teams who need precise temp/humidity readings tied to samples; it’s optional for casual sampling but excellent for calibrated datasets.
Great question, Anna. For short-term observation water or saline is fine (less refractive index change), but for longer-term mounts glycerin or a resin-based mounting medium is better to prevent drying and preserve morphology. If you want archival slides, use a proper mounting medium and seal well.
This is excellent, Maya — thanks for the checklist. Pre-labelling and photographing notes are two habits we always recommend in the article. For sample IDs we also like a short alphanumeric code (site-date-transect) to avoid ambiguity.
Glad they gave your old binos a new lease on life. It’s nice when a cheap pair performs better than expected after measuring.
Good troubleshooting, Daniel. Locking focus/exposure or using a dedicated camera app often fixes those reflection autofocus problems. Also try angling slightly to avoid direct reflections.
Thanks Laura — glad the portability angle resonated. Good tip pairing the ZV-E10 with the 25mm F1.7; that lens is a surprisingly good value. We’ll fix that typo in the next revision.
Solid suggestion, Liam. We’ll add a quick reference table in the next update listing water, glycerin, Canada balsam, DPX, and their approximate refractive indices and best-use cases.
Ha — we should put that motto on a sticker. Good reminder about IPD; it can affect perceived overlap of exit pupils and comfort.
Modern art panning is a rite of passage! Glad the article helped and nice persistence, Noah.
And don’t forget to balance the rig well — poor balance increases periodic error and shortens guide camera life.
Both are useful, but for deep-sky the tracking mount unlocks longer exposures and higher-quality subs. If you can only pick one, go mount first — you can always stack many short exposures from a fast lens, but tracking lets you get cleaner, deeper subs.
Thanks Rachel — glad the piece helped! Rotating the phone is a great practical trick; it can also help you find the sweet spot where the phone camera axis matches the eyepiece. Appreciate the tip!
Great to hear, Eve — let us know how your tests go. If you can share any before/after shots or notes on perceived color shifts that would help other readers.
Short answer: usually no. zttopo smartphone remotes are made for phones (Bluetooth) and not for direct DSLR triggering unless the manufacturer specifically lists camera compatibility or you use an intermediary (like a phone app that controls the camera via Wi‑Fi). Better to buy a remote that lists your camera model or a universal wired/RF remote.
If you want, tell us your camera model and we can suggest a compatible, budget-friendly option from the product list or alternatives.
Awesome — glad the workflow helped. If you can, post before/after test frames in the comments later; others would benefit from concrete examples.
Great observations, Hannah. Under light-polluted skies, lowering magnification increases the background brightness per apparent area, which can wash out extended targets. So sometimes you actually need higher magnification in light pollution to improve contrast even though it reduces the exit pupil. Also check transmission and your eye state — all three factors you listed can contribute.
Good point Marcus — the RP is an affordable entrance into FF. We tried to balance value vs performance in the lens section; RF lens prices are improving but still something to factor in.
Thanks, Laura — glad the battery section was helpful. For biking, helmet mounts typically give less bobble than chest mounts for head movements, but chest can feel more immersive. If you’re worried about wobble, pair a solid helmet mount (like the 12-in-1 Helmet Adhesive Mount) with a short arm and consider a gimbal-style stabilizer or electronic stabilization in-camera.
Hah — moving targets are the worst. Stationary landmarks or bright stars are the reliable choices. Plane chase is an extreme sport though.
Couldn’t have said it better — ‘best camera for your brain’ is a great tagline. We wanted to be practical, not prescriptive.
Good catch, Hannah. We’ll add a small troubleshooting box for imaging: use a diffuser, lower ambient light, angle the phone slightly, and make sure the phone camera is centered over the eyepiece. A phone-to-eyepiece adapter also helps stabilize and reduce glare.
This is a common issue — many multi-camera phones default to ultrawide or switch lenses automatically. Use your phone’s camera app to select the main (1x) lens, then lock exposure/focus or use a third-party app that lets you force a specific lens. Physically centering the adapter over the correct lens helps too.
Awesome — CPLs are underrated for action cams. Just watch for vignetting if you stack filters or use a super wide FOV. The article mentions trade-offs: sometimes less wide-angle can reduce edge artifacts when using filters.
Color casts can come from cheaper filter coatings interacting with the sensor/white balance. Try setting a manual WB in-camera and test each filter alone to isolate the issue. If it’s consistent across filters, likely camera profile; if only with certain filters, there may be a coating imbalance.
Exactly — exit pupil and eye relief interplay a lot with perceived brightness and comfort. Glad that section was useful. Good point about glasses; many forget that.
Good question. If portability and occasional quick shots are your priority, the APEXEL is cheap and fun for macro/very close-up views. For more serious, higher-resolution work and consistent lighting, the 4K USB handheld microscope + stand is a better long-term option. Also consider whether you want eyepiece-style observation (adapter + microscope) vs direct handheld imaging.
Totally — Carson is great for quick ID and outreach. For documentation or publication-quality images, pair it with a smartphone adapter or use the Portable 500x for higher-res captures.
Great feedback, Victor. A comparison table is a clear way to show trade-offs — we’ll include one in the next edit.
Glad it helped, Sarah! For slippage try adding a thin strip of non-slip drawer liner between the phone and adapter. Silicone tape is usually safe but use a thin piece — it can leave residue over long periods. Clean with isopropyl afterward.
Glad it helped, Maya! Totally agree on the early light — and the Tamron’s RXD focus is surprisingly snappy for its class.
Thanks, Lucas — a FAQ is a great idea and would help clarify common points. We’ll draft one that covers those exact misconceptions.
Mirrorless do change the math. Mechanically, always aim for the least amount of adapter complexity — fewer joints = less wobble. If you can get precise focus with a motorized focuser, that’s ideal. Focus stacking is great for planetary or close-ups; for deep-sky it’s usually unnecessary and introduces alignment headaches. So my short answer: prioritize mechanical stability, then use motorized focus for fine control; stack only when it adds something.
Great practical notes, Marcus. Re-checking during the night is often overlooked. And custom masks are a clever low-tech solution many folks forget about.
Exactly — the piece tries to frame those compromises so people pick the right tool. Post-processing and a good flat/color profile help a lot if you’re serious about color grading later.
Diatoms are a beautiful test subject! High-power kits can show diatom structure if they have good optics and condenser control. But be wary — advertised max magnification doesn’t always equal usable image quality.
Good point, Mark — I’ll add a short decision flow in a follow-up post (travel/workflow focused). Short answer: start with CPL for reflections, add ND for shutter control, then UV mainly for protection/flare control depending on scene.
Good point about the reducer/flattener combo. Sag depends on clamp spacing and rail thickness — on my rail with a single clamp I saw ~0.5mm sag at 1.5kg, but spreading the load with a second clamp reduced it to almost nothing. I’ll try to include measurement methodology in the next update.
Thanks — adding DIY measurement tips (coins, dial indicator, smartphone level) is a great idea.
Good technical note, Owen — the exposure triangle plays with ND filters, so you either need more light or slower shutter (or higher ISO, with noise penalty). Glad that section was useful.
Thanks Omar — agree that AR screen films and polarized sunglasses are the most tangible, everyday examples. Good to hear the S25 film worked well for you.
Exactly — MFT can be underestimated. Thanks for the practical ISO tip. We tried to avoid blanket judgments and focus on workflow tradeoffs.
Good questions, Noah. For permits: start with the landowner/manager (park office, forest service, private owner). For most low-impact community science (non-destructive photos, non-collecting), a heads-up is often enough. For taking samples, even small ones, ask — many places have simple research permit forms.
Regarding the Fieldpiece kit: it’s optional. Use it when you need precise microclimate metadata (temp/humidity at time of sample). For casual ID outings, a phone app and a shaded temp reading are usually sufficient.
Good point, Joanna — magnification without resolution isn’t helpful. The article tried to emphasize optical quality (aperture, lens type) over just ‘X’ numbers. Thanks for calling that out!
So glad that helped, Sophie. Good tip about pencil — we’ll emphasize using a glass-safe pencil or alcohol-resistant marker for oils.
Good point. We’ll expand Step 3 to mention refraction and recommend using targets at least 30 degrees above the horizon when doing fine alignment. Thanks!
Start the tracker, let it settle for a moment after any periodic error correction or slew, then start the intervalometer. If your tracker supports an external trigger out or sleep mode, coordinate those, but generally a 1–3s buffer after the tracker starts is enough.
Good tip, Hannah. Also note mount balancing: a poorly balanced rig can introduce tiny movements even when tracking, so balance carefully before starting.
A ritual helps! Many experienced observers have a checklist — power on, counterweights, rough align, check finders, then star-hop. Glad the tips helped.
Love the long-format feedback, Tom. Agree on testing: adhesives, clamping, and battery cycles should be field-tested. The Neewer kit is great for redundancy.
Good catch. We’ll add a brief test: nudge the mount in one direction, then reverse and see if the finderscope lags before responding. If it does, that’s backlash. Also include checks for gear mesh and clutches.
Great practical tips, Carlos. Warming viscous media and making thin smears are excellent ways to improve slide quality. And yep, watch that pressure — even a tiny drop can change morphology.
Happy it helped, Ethan. AF and codecs are indeed crucial for vloggers — sensor size only tells part of the story.
Good point about batteries — we’ll add a short note about practical battery/runtime considerations in the gear section.
Thanks Diego — we wanted to make the point that ‘newer’ isn’t always better for every photographer. Used FF can be an awesome value.
Love that! Engagement is half the battle in homeschool science. Adapters that let kids document their finds are fantastic motivators.
That’s a smart approach, Omar. Start small, see interest levels, and upgrade later. Happy exploring!
Nice catch on the typo — thanks, I’ll fix that. As for ISO: for most DSLRs it’s best to use a moderate ISO that gives good dynamic range (often mid-range), then increase total integration time via more subs. Stacking more subs usually beats one very high-ISO shot.
Great suggestion, Priya — adding prep times would be helpful. We’ll consider including a quick ‘time to set up’ estimate for each activity in a follow-up.
Totally relatable, Isabella. Perch patience is all about knowing routines — feeding times, favored perches, and a bit of camouflage. We’ll add a short checklist for perch-shot scouting.
Start by removing pieces: test camera directly on telescope (if possible) to see if tilt persists. Then add the filter wheel alone, check again. If tilt appears after adding the wheel, rotate it 180° and test — some cheap wheels have slight flange misalignment that’s rotationally dependent. Also check the drawtube of the telescope for slop.
One more tip: if the filter wheel has removable adapter plates, try swapping them to see if the tilt stays with the wheel or the adapter. Keeps the troubleshooting methodical.
Good question — generally, abrasion-resistant topcoats aim to be optically neutral, but imperfect deposition can slightly change reflectance. Long-term testing is sparse in the public domain; manufacturers often do private life tests.
Good suggestion, Carlos — adding a presets table is a great idea. For a quick rule of thumb: shorter focal lengths = longer exposure per frame before star trailing; for timelapses, aim for consistent exposure and use bulb ramping to handle sky brightness changes.
You’re not alone, Ben — it’s a common confusion. Frame rate is frames captured per second; shutter speed controls motion blur per frame (ideally shutter ≈ 1/(2*frame rate) for natural motion). Practicing menus makes switching profiles on the fly much smoother.
Good note — we’ll add a photo of the locking hardware in the next update. For now, tighten just enough to hold the alignment; use fingertip tension and then a small nudge with the tool if needed.
Great question. Tighten screws in small, alternating increments (like a star pattern). Avoid fully tightening one screw before the others — that can tilt the bracket. Also re-check alignment after final tightening.
Also consider using a torque-limiting driver if you have one; consistent torque helps prevent drift.
Good call, Hannah. We’ll add more anecdotal AF performance notes and sample frame-rate behavior in a follow-up update — thanks!
Either works. Planets are great because they’re bright and obvious; stars like Sirius are point sources which can be easier to center precisely. In light-polluted skies, use whatever is brightest and easiest to identify.
Been there — beetle photos are an initiation rite. Small lateral adjustments can indeed reduce fringing because you align the optical axes better; also try stopping down if your microscope allows it.
If the finderscope body moves when touched, that’s a mechanical issue — tighten the mounting hardware and check for play in the dovetail. That wobble will translate to significant error at high mag. Also verify the finderscope base itself isn’t cracked or loose.
Great practical teaching tip — adaptive streaming quality keeps sessions inclusive. Thanks for sharing how you integrate hardware and pedagogy!
Yes — back-button AF with continuous tracking (AI Servo / Tracking) is what many pros use. It separates focus from shutter and gives you more control for birds in flight.
Good point, Ben. We focused on widely available options for ease, but including local/used equipment tips is a great idea for future pieces.
AKASO EK7000 is a solid budget waterproof option with a dedicated housing and more physical camera controls; good battery life and accessory ecosystem. The i3 is excellent for ultra portability and quick clip-on POVs but may sacrifice battery and manual control. If you prioritize rugged water use and longer sessions, AKASO is a safer bet.
Love the coffee analogy — we’ll steal that line! Appreciate the practical take on MFT for hikers.
A couple of degrees is fine for the daylight rough alignment — that’s what Step 2 is for. If your red dot is adjustable like a finderscope, treat it the same way: coarse align during day, then fine-tune on bright stars at night. The main difference is magnification; pinpoint finders help with centering at low power.
Love the dog photobomb — that’s the best kind of wildlife 😂 And great tips: physical movement > digital zoom, and remote shutter/self-timer reduces shake.
Glad it helped, Emma! For projecting the objective’s focus you want the room as dark as possible — streetlight leakage can shift your apparent focus. A dim room with blackout curtains usually does the trick. Also try using a piece of white paper a few meters away to get a sharper image.
Thanks for the kind words, Maya. With a Star Adventurer tracker you usually shorten single exposure times to reduce streaking and then stack. If the tracker is accurate and polar-aligned well, you can push single exposures longer — but I still recommend syncing the intervalometer to the tracker start (use a short delay between mount movement and exposure).
Good point. For DSLR method, use live-view and a zoomed-in focus assist. Start with the objective roughly at the camera’s hyperfocal range for a distant target, then adjust until a background target comes to a sharp focus through the objective. Measure lens-to-sensor distance then. We’ll expand that section.
Thanks Lina — great suggestions. We’ll see if we can get some example spectra into the next edit, and maybe a short demo with the Calibrite unit.