This step-by-step guide provides instructions on how to adjust sunglasses with interchangeable lenses, allowing you to switch out lenses for different light conditions. By following these instructions, you can achieve optimal comfort and vision.
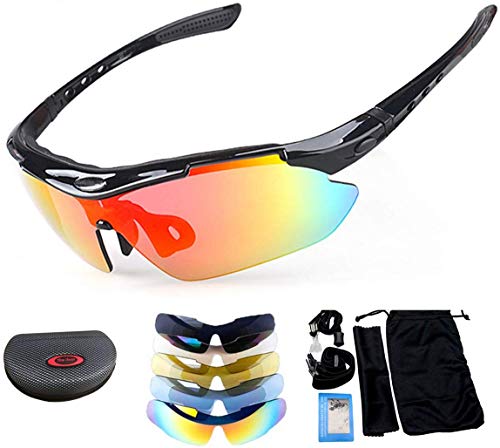
Versatile Eyewear for Every Occasion


Inspect the Sunglasses
Before adjusting your sunglasses, it is important to inspect them for any damage or loose parts. This will ensure that they are in good condition and safe to wear. Follow these steps to carefully inspect your sunglasses:
- Check for damage or loose parts: Examine the frame of your sunglasses for any visible cracks, dents, or loose screws. Pay attention to the hinges and nose pads as well. If you notice any issues, it is recommended to consult the manufacturer or a professional for repairs or replacement parts.For example: Inspect the frame under good lighting and use a magnifying glass if needed. Look for any signs of damage or any areas where the frame may appear weakened.
- Examine the lenses: Inspect the lenses for any scratches, cracks, or other imperfections. Hold the sunglasses up to the light and look through them to see if there are any distortions or blurriness. Clean the lenses using a microfiber cloth or a lens cleaning solution if necessary.For example: Hold the lenses up to the light and rotate them to check for any scratches or areas of damage. If the lenses appear hazy or distorted when looking through them, it may indicate a need for replacement.
- Ensure proper fit and alignment: Put on the sunglasses and look in the mirror to check if they sit comfortably on your face. Pay attention to the alignment of the lenses with your eyes. They should be centered and at the correct height. Adjust the nose pads and temple arms if needed for a better fit.For example: Put on the sunglasses and adjust them while looking in the mirror. Check that they rest comfortably on your nose and ears without causing any pressure points or slipping. Ensure that the lenses are aligned with your eyes and offer proper coverage.
By carefully inspecting your sunglasses before making any adjustments, you can help prolong their lifespan and ensure both comfort and protection for your eyes. Remember, if you encounter any issues or damage during the inspection, it is best to seek professional assistance rather than attempting repairs yourself.


Identify the Interchangeable Lens Mechanism
Different sunglasses brands may have varying mechanisms for interchangeable lenses. Follow these steps to identify the interchangeable lens mechanism:
- Look for a release or locking mechanism on the sunglasses frame.
- Slide the mechanism in the direction indicated to release the lens. For example, Oakley sunglasses usually have a small lever on the side of the frame that needs to be pushed down to release the lens.
- Pop the lens out gently by applying some pressure on the edge of the lens. Some brands, like Ray-Ban, have a tab on the upper corner of the lens that can be pressed to pop it out.
- To secure a new lens, align the lens with the frame and push it firmly until it clicks into place.
- Twist the frame or lens if there is a twisting mechanism to lock the lens in place. For instance, Maui Jim sunglasses often have a small rotating mechanism on the frame that needs to be turned to secure the lens.
Remember to consult the specific instructions provided by the manufacturer of your sunglasses for the most accurate and detailed information on how to use the interchangeable lens mechanism.
Remove the Current Lens
To remove the current lens, carefully follow the manufacturer’s instructions. Gently push or pull the lens until it releases from the frame. Be cautious not to apply excessive force that could potentially damage the sunglasses.


Prepare the New Lens
- Select the appropriate lens: Assess the current light conditions and choose the lens that best suits your needs. Consider factors such as focal length, aperture, and image stabilization to capture optimal shots.
- Clean the lens: Ensure that the lens is free from any fingerprints or smudges that can affect image quality. Using a microfiber cloth or lens cleaning solution, gently wipe the lens surface in a circular motion. Pay attention to both the front and rear elements of the lens.
- Inspect for dust or debris: Examine the lens carefully for any dust particles or debris that may have settled on it. If you spot any, use a blower brush or compressed air to remove them. Avoid using your breath to blow on the lens, as it may introduce moisture that can damage it.
- Check the lens contacts: If your lens has electronic contacts, take a moment to inspect them. Ensure that they are clean and free from dirt or grease. If necessary, use a cotton swab lightly moistened with isopropyl alcohol to gently clean the contacts.
- Protective measures: Consider attaching lens caps or covers on both ends of the lens to prevent further contamination or accidental damage. Always store the lens in a dust-free and moisture-free environment, such as a camera bag or case, when not in use.
Align and Insert the New Lens
- Carefully align the new lens with the frame by inspecting any notches or tabs on the lens and matching them with the corresponding slots or grooves on the frame. For example, if the lens has a triangular notch, locate the triangular slot on the frame and align them together.
- Gently and firmly press the lens into place, ensuring that it is securely attached to the frame. Apply even pressure around the edges of the lens to avoid any potential damage or misalignment. Imagine placing a puzzle piece into its designated spot, making sure it fits perfectly.
- Once the lens is properly aligned and securely attached, double-check for any gaps or loose edges. If necessary, give the lens a slight additional push to ensure it sits snugly in the frame. Imagine closing a zipper all the way until it’s fully fastened.
- Voila! You’ve successfully aligned and inserted the new lens into your frame. Now you can enjoy clear vision with your renewed eyewear. Remember to handle the lenses with care to avoid scratches or other damage during the alignment and insertion process.

Test the Lens Fit
- Put on the sunglasses: Wear the sunglasses and make sure they are properly aligned on your face.
- Check the lens alignment: Confirm that the lens covers your entire field of vision without any gaps or misalignment.
- Adjust if necessary: Gently push or pull the lens to adjust its position so that it fits comfortably on your face.
- Ensure clear vision: Make sure the lens provides clear vision and there are no obstructions that affect your sight.
- Ensure comfort: Confirm that the sunglasses feel comfortable on your face and do not cause any discomfort or pressure points.
- Confirm lens fit: Once the lens is properly aligned, covers your field of vision, provides clear sight, and feels comfortable, the sunglasses are ready to be worn.
Repeat for Additional Lenses
Repeat steps 3 to 6 for each additional lens you have. Start by removing the current lens from the frame. Then, carefully align the new lens with the lens mount on the frame. Gently push the lens into place until you hear a click or feel it securely attach to the frame. Finally, double-check that the lens is properly inserted by giving it a slight twist clockwise and counterclockwise to ensure it doesn’t come loose during use.
For example, if you have a camera with two interchangeable lenses, begin by following steps 3 to 6 to attach the first lens. Once it is securely in place, detach it by following step 3 again. Then, grab the second lens and align it with the lens mount on the frame. Push it in gently until you hear or feel it click into position. To ensure it is properly attached, give it a slight twist in both directions. Repeat these steps for any additional lenses you want to use, taking your time to ensure each lens is securely attached to the frame.
Clean and Store Unused Lenses
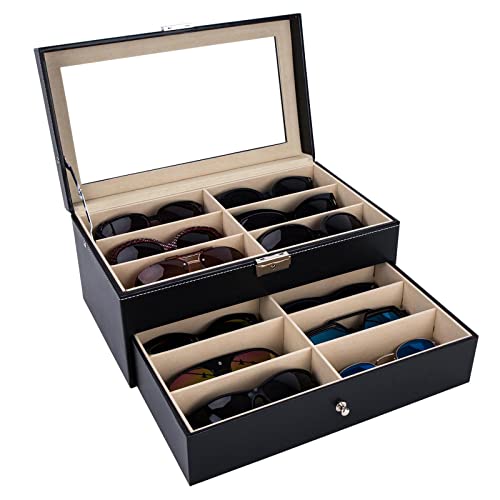
1. Protect: Safeguard your lenses from scratches and dust by placing them in a lens case or microfiber pouch when not in use.
2. Clean: Ensure your lenses are pristine by using a lens cleaning solution and a microfiber cloth to gently remove any dirt or smudges.
3. Store: Once cleaned, carefully place your lenses in the protective case or pouch, making sure they are secure and won’t shift during storage.
4. Avoid Exposure: Always store your lenses in a cool, dry place away from direct sunlight, extreme temperatures, and humidity to prevent any potential damage.
5. Regular Inspection: Periodically check your stored lenses for any signs of damage, such as cracks or distortion, to ensure their continued functionality.
6. Maintenance: If storing your lenses for an extended period, consider removing them from the case or pouch every few months to inspect, clean, and keep them in optimal condition.
Remember, by following these simple steps to clean and store your unused lenses, you’ll be able to maintain their quality and prolong their lifespan.
Adjust the Nose Pads and Temple Arms
- Check the manufacturer’s instructions: Before you begin, refer to the manufacturer’s instructions for adjusting the nose pads and temple arms. This will ensure that you are following the appropriate method for your sunglasses.
- Nose pads adjustment: If needed, gently press on the nose pads to adjust their position. Test the fit by wearing the sunglasses and make sure they sit comfortably on your nose without pinching.
- Temple arms adjustment: To adjust the temple arms, hold the sunglasses with one hand and use the other hand to carefully bend them outward or inward. Adjust until the sunglasses securely hug your head without sliding down or causing discomfort.
Remember, proper adjustments to the nose pads and temple arms can greatly improve the fit of your sunglasses, providing both comfort and stability.
Regular Maintenance and Care
Clean your sunglasses regularly using a lens cleaning solution and a microfiber cloth. Avoid using harsh chemicals or abrasive materials that could damage the lenses. Store your sunglasses in a protective case when you’re not wearing them.
Final Thoughts
In conclusion, mastering the art of adjusting sunglasses with interchangeable lenses is within reach. By following these simple steps, you can enjoy the perfect fit and clarity in your eyewear. Don’t forget to take care of your lenses and maintain them well to maximize their longevity. With these techniques in your arsenal, you’ll always be ready to tackle any lighting conditions with style and ease.
Necessary Equipment