How to Adjust the Fit of your Ray Ban Sunglasses for Maximum Comfort
In this step-by-step guide, we understand that comfort is key when it comes to wearing sunglasses, especially when they are as stylish and popular as Ray Ban sunglasses. We aim to provide you with the knowledge and tools necessary to make adjustments to your sunglasses for the perfect fit. By following the instructions carefully, you will be able to customize the fit of your Ray Bans to ensure maximum comfort and functionality. So, whether you’re lounging on the beach or going for a run, you can enjoy your Ray Bans with confidence and comfort.
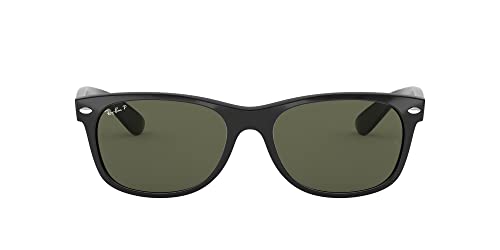
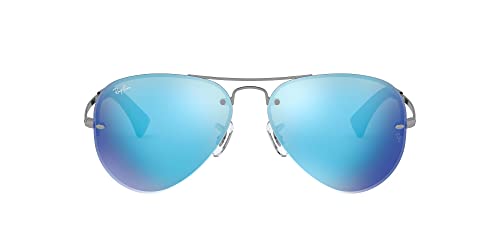
Top-Selling Shades for summer


Inspect the sunglasses
Inspect the sunglasses: Before adjusting the fit, carefully examine your Ray Ban sunglasses for any visible damage or loose parts. Check the hinges and screws, ensuring that they are secure and in good condition. If you notice any issues, such as broken hinges or loose screws, consider getting them repaired or replaced before adjusting the fit.


Identify the problem areas
Put on the sunglasses and assess the areas that require adjustment. Check the nose pads to ensure they are positioned comfortably on your nose. Examine the temple tips to ensure they are securely resting on your ears. Evaluate the overall tightness or looseness of the frame to ensure a snug and comfortable fit.
Adjust the nose pads
To adjust the nose pads on your sunglasses:
- Use your fingers to gently squeeze or widen the pads.
- Apply slight pressure to the pads and move them closer together or further apart, depending on your comfort.
- Keep adjusting until the pads sit comfortably on your nose without slipping.
- Make sure to test the fit by wearing the sunglasses and checking if they stay in place.


Tighten or loosen the temples
If the temples of your glasses are either too tight or too loose, follow these simple steps to adjust them:
- Adjusting Tight Temples:
- Hold the glasses with one hand, placing your thumb on the inside of the temple and your fingers on the outside.
- Carefully bend the temple outward, applying gentle pressure until you achieve a looser fit.
- Test the fit by putting on the glasses and adjusting as needed until the temples feel comfortable.
- Adjusting Loose Temples:
- Hold the glasses with one hand, placing your thumb on the inside of the temple and your fingers on the outside.
- Gently squeeze the temple inward, applying slight pressure to tighten the fit.
- Test the fit by putting on the glasses and adjusting as needed until the temples sit securely and comfortably on your ears.
Example for Tight Temples:
Hold your glasses with one hand and rest your thumb on the inside of the temple while your fingers grip the outside. Apply gentle pressure by bending the temple outward. Repeat this process several times if needed, until the temples feel less tight when you wear them.
Example for Loose Temples:
Hold your glasses with one hand and position your thumb on the inside of the temple, while your fingers secure the outside. Apply slight pressure by gently squeezing the temple inward. Repeat this step if necessary, ensuring the temples sit firmly and provide a comfortable fit when you wear your glasses.
Remember, adjusting the temples to achieve the perfect fit might require some trial and error. Take your time and make small adjustments as needed until your glasses feel comfortable and secure on your face.
Check the temple tips
- Check the temple tips to make sure they are not causing any discomfort or digging into your ears.
- If you find that they are causing discomfort, gently bend the temple tips to adjust their angle. This will help achieve a more comfortable fit.
- For example, if the temple tips are too straight, try bending them slightly outward so they follow the natural curve of your ears.
- Conversely, if the temple tips are too curved and pressing too hard against your ears, gently bend them inward to reduce the pressure.
- Remember to make small adjustments at a time and test the fit after each adjustment to ensure you don’t over-bend the temple tips.
- By properly adjusting the angle of the temple tips, you can significantly improve the comfort of your glasses and prevent any potential discomfort.


Evaluate the overall fit
Put on the sunglasses and carefully observe how they fit on your face. Take note of any pressure points or areas of discomfort you may feel. If there are any issues, go back to the previous steps and make necessary adjustments until you achieve a comfortable fit.
Reposition the nose pads
To reposition the nose pads, follow these steps:
- Identify the discomfort: If the nose pads of your glasses are causing discomfort, such as pinching or sliding down your nose, it’s time to reposition them.
- Inspect the frame: Take a close look at your glasses frame to locate the position of the nose pads. They are typically attached to small metal arms or mounted directly on the frame.
- Gently adjust the position: Using your fingers, carefully push the nose pads upwards or downwards on the frame. Start with small adjustments, and test the comfort level after each change.
- Experiment with different positions: Move the nose pads up or down in small increments until you find a position that feels most comfortable on your nose. Try several positions and take note of the changes in comfort each time.
Remember, the goal is to achieve a proper fit where the nose pads evenly distribute pressure on your nose, without pinching or slipping. Take your time and experiment until you find the most comfortable placement for your nose pads.
Make additional adjustments
If you are experiencing areas of discomfort or the fit of your glasses is not ideal, there are several additional adjustments you can make. First, try using nose pad covers to alleviate any pressure on your nose. Next, consider using temple grips to improve the fit and prevent slipping. If these adjustments do not solve the problem, it is recommended to consult a professional optician for expert assistance and further adjustments.
Test the sunglasses
- Put on the sunglasses and adjust the temples to comfortably sit over your ears.
- Tilt your head up and down, side to side, and vigorously shake your head to test if the sunglasses stay in place without wobbling or sliding off.
- Additionally, perform activities such as jogging, bending over, and jumping to ensure the sunglasses remain securely fitted to your face throughout various movements.
- If you feel any discomfort or notice slippage, try readjusting the temples or consider trying a different pair of sunglasses for a better fit.
Repeat as needed
Remember that adjusting the fit of your Ray Ban sunglasses is a personalized process. To achieve the desired comfort and fit, repeat any of the previous steps as needed.
- Evaluate the fit by checking if the sunglasses rest comfortably on your nose bridge and temples.
- If the sunglasses feel too tight, loosen the temple screws by turning them counterclockwise using a small screwdriver.
- If the sunglasses feel too loose, tighten the temple screws by turning them clockwise using a small screwdriver.
- Try on the sunglasses again and assess the fit.
- If necessary, repeat the steps of loosening or tightening the temple screws until you achieve the desired comfort and fit.
- Remember to handle the screws with care to not overtighten or loosen them excessively.
- Once you find the perfect fit, enjoy wearing your Ray Ban sunglasses with confidence and style.
Achieve Perfect Fit
In summary, proper fit is crucial for comfortable wearing of Ray Ban sunglasses. This article has provided a clear set of instructions on how to adjust the fit to suit your preferences. By following these steps, you can ensure a personalized and comfortable experience with your sunglasses.
Necessary Items


Optimal Sunglass Fit
Unveiling the Reality of Ray Bans #Exposed
Steps to properly wear and care for your Ray Ban sunglasses
- Start by properly adjusting the sunglasses to fit your face. Slide the nose pads in or out to ensure a comfortable and secure fit
- When putting on or taking off the sunglasses, use two hands to hold the frame by the temples (arms) to prevent any bending or warping
- When not in use, store the sunglasses in a protective case to prevent scratches and damage. Avoid leaving them in extreme heat or direct sunlight
- When cleaning the lenses, use a microfiber cleaning cloth or lens cleaning solution specifically designed for sunglasses. Avoid using paper towels or rough materials that may scratch the lenses
- If the sunglasses get wet, gently dry them with a soft cloth to avoid water spots or damage. Do not use a hairdryer or any heat source to dry them
Frequently Asked Questions about Ray-Ban Sunglasses
What is the history of Ray Ban sunglasses?
Ray-Ban is a well-known brand of sunglasses that has a rich and interesting history. The company was founded in 1937 by American company Bausch & Lomb. The sunglasses were initially designed to meet the needs of US Army Air Corps pilots, who were suffering from headaches and nausea caused by the intense glare at high altitudes.
The first model, called the Aviator, was introduced in 1936 and quickly gained popularity among pilots due to its effective glare reduction and stylish look. Following this success, Ray-Ban launched another iconic model in 1952 called the Wayfarer. Its unique design with plastic frames and trapezoidal lenses made it a fashionable accessory and quickly gained popularity among celebrities and the general public.
In the 1960s, Ray-Ban became a symbol of rebelliousness and counterculture, favored by musicians, actors, and artists. However, by the 1970s, the brand’s popularity declined, and it faced financial difficulties. In 1999, Luxottica Group, an Italian eyewear company, acquired Ray-Ban and successfully revived the brand.
Today, Ray-Ban sunglasses remain highly popular and have expanded their product range to include various styles, colors, and lens technologies. The brand’s commitment to quality, innovation, and timeless style has made Ray-Ban a global leader in the eyewear industry.


