We understand how important it is for you to capture life’s precious moments effortlessly. With our step-by-step guide, switching between photo and video mode on your sunglasses equipped with a camera has never been easier. Say goodbye to the hassle of carrying around a separate camera and say hello to a more convenient way of capturing memories. In just a few simple steps, we’ll help you navigate the mode settings so you can seamlessly switch between capturing snapshots and recording videos. Get ready to embrace the future of photography with our user-friendly guide.
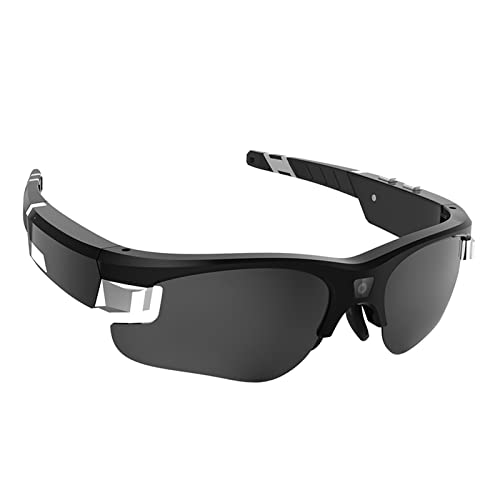
Capture Memories in Style


Step 1: Powering on the sunglasses
- Press and hold the power button on the sunglasses firmly with your finger.
- Keep holding the power button until the indicator light turns on.
- Release the power button once the indicator light illuminates completely.
- Wait for the sunglasses to initialize and prepare for use.
- Verify that the indicator light remains steady, indicating that the sunglasses are ready to be used.

Step 2: Accessing the camera mode menu
- Locate the mode button on the sunglasses frame.
- Press the mode button once.
- This will bring up the mode selection menu on the sunglasses’ camera.
- In the mode selection menu, you can choose between different camera modes by using the navigation buttons on the sunglasses or by simply tapping the desired mode on the screen.
- Once you have selected the desired camera mode, press the mode button again to confirm your selection.
- You are now ready to start using the camera in the selected mode.
Remember to always hold the sunglasses securely while accessing the mode menu to prevent any accidental drops or damage.

Step 3: Selecting photo mode
To select the photo mode, first, access the mode selection menu on your device. Look for the icon that represents photo mode, usually displayed as a camera. Once you have located it, use the navigation buttons available on the sunglasses frame to navigate and highlight the photo mode option. Ensure that the icon or text for the photo mode is selected before moving on to the next step. Remember to double-check your selection to avoid any mistakes.

Step 4: Taking a photo
To take a photo using the sunglasses, start by selecting the photo mode. Once in photo mode, simply aim the sunglasses at the subject you want to capture. Ensure that the subject is within the frame and in focus. Now, it’s time to capture the moment. Press the capture button, which is usually located on the frame or the temple of the sunglasses. As you press the button, listen for a distinct shutter sound or look for a visual indication that the photo has been captured. And voila! You have successfully taken a photo with your sunglasses. Remember to review the image to ensure it meets your expectations and make any necessary adjustments before taking further photos.


Step 5: Switching to video mode
To switch to video mode, press the mode button once to access the mode selection menu. Once you are on the menu, use the navigation buttons to locate the option for video mode. It is usually represented by an icon of a video camera. For instance, on many cameras, the video mode is indicated by a small film reel icon. Once you have located the video mode option, use the navigation buttons to select it.
For example, if you are using a Canon camera, press the right button to highlight the video mode icon, and then press the “Set” button to confirm your selection. On a GoPro camera, use the up or down buttons to navigate to the video mode option, and then press the shutter button to choose it. The method may vary depending on the make and model of your camera, but the general process remains the same.
Step 6: Recording a video
To record a video using the sunglasses, follow these steps:
- Select the video mode on the sunglasses.
- Aim the sunglasses at the subject you want to record.
- Locate the record button, usually found on the frame or temple of the sunglasses.
- Press the record button to start recording.
- To stop recording, simply press the record button again.
- Pay attention to any beeping sound or indicator on the sunglasses, as it will notify you when recording starts or stops.
Remember:
- Select video mode.
- Aim sunglasses.
- Press record button to start/stop recording.
- Notice beeping or indicator for recording status.
Final thoughts: Making the switch
In conclusion, with the advancements in technology, sunglasses equipped with a camera offer a seamless transition between photo and video modes. This feature allows users to capture their favorite moments with ease while enjoying the benefits of a stylish and hands-free device. So, go ahead and grab a pair of these sunglasses to document your experiences in a whole new way.
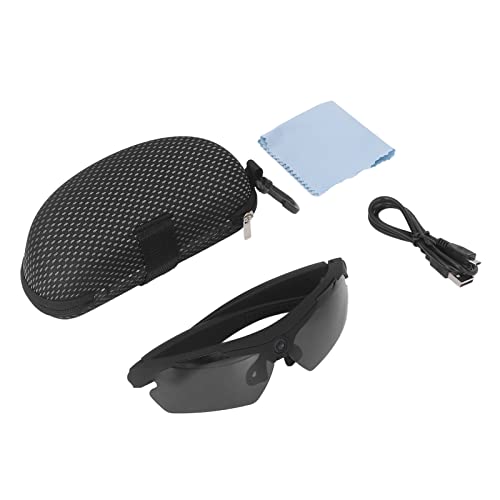
Necessary Equipment
Mode Switching Tips
Setting the Date on the Spy Camera Sunglasses: A Step-by-Step Guide
Step-by-Step Guide to Using Sunglasses with Built-in Camera
- Charge the sunglasses: Before use, make sure the sunglasses are fully charged by connecting them to a power source using the provided USB cable
- Activate the camera: Once the sunglasses are charged, locate the power button on the frames and press and hold it until the camera LED indicator turns on
- Adjust the positioning: Adjust the sunglasses on your face to ensure the camera lens is pointing towards the direction you want to capture. This may require minor movements or tilting the sunglasses slightly
- Start recording: To start recording videos, press the capture button located on the frames. The LED indicator will blink or change color to signify that the camera is recording
- Capture photos: To capture a photo, press the capture button once while in video mode. The LED indicator will flash once to indicate a photo was taken
- Review and download content: Use the provided USB cable to connect the sunglasses to a computer or smartphone. Access the device’s internal storage or SD card (if applicable) to review and download the recorded videos and photos
- Adjust settings (optional): Explore the sunglasses’ manual or user guide to learn how to change settings such as video resolution, photo format, and other customization options according to your preferences
Frequently Asked Questions about Sunglasses with Built-in Camera
What is the storage capacity of sunglasses with a built-in camera?
The storage capacity of sunglasses with a built-in camera can vary depending on the specific model and brand. Some sunglasses with cameras offer internal storage capacities ranging from 4GB to 64GB. However, it’s important to note that certain models may also support expandable storage options through the use of microSD cards, which can increase the overall storage capacity.
Are sunglasses with a built-in camera suitable for outdoor activities?
Yes, sunglasses with a built-in camera can be suitable for outdoor activities. These sunglasses offer the convenience of capturing hands-free photos and videos while engaging in various outdoor activities such as hiking, biking, skiing, or water sports. They provide an easy and effortless way to record your experiences without the need for extra equipment or holding a camera. However, it is important to consider the quality and specifications of the camera, as some models may have lower resolution or limited recording capabilities. Additionally, factors such as battery life and storage capacity should be taken into account to ensure that the sunglasses can meet your specific needs during outdoor activities.
What is the video quality like on sunglasses with a built-in camera?
The video quality on sunglasses with a built-in camera can vary depending on the brand, model, and specifications of the device. Generally, the video quality is decent but may not be on par with dedicated action cameras or smartphones. The resolution typically ranges from 720p to 1080p HD, providing fairly clear and smooth video footage. However, due to the small size of the camera, the field of view might be limited, resulting in a narrower perspective. Additionally, factors like lighting conditions and stability can also affect the overall video quality.
How do you transfer the recorded footage from sunglasses with a built-in camera to a computer or smartphone?
To transfer the recorded footage from sunglasses with a built-in camera to a computer or smartphone, you typically need to follow these steps:
- Check the available connectivity options: Review the sunglasses’ user manual or specification to determine the available connectivity options for transferring the footage. Common options include USB, Bluetooth, or Wi-Fi.
- USB transfer: If the sunglasses have a USB port, connect them to your computer or smartphone using a USB cable. Ensure the sunglasses are powered on and set to the appropriate transfer mode. The computer or smartphone should recognize the sunglasses as an external storage device, allowing you to access and transfer the recorded footage.
- Bluetooth transfer: If the sunglasses have Bluetooth capabilities, ensure the Bluetooth is enabled on both the sunglasses and the computer or smartphone. Pair the devices, following the instructions in the user manual. Once connected, locate the recorded footage on the sunglasses and use the Bluetooth file transfer feature to send the files to your computer or smartphone.
- Wi-Fi transfer: If the sunglasses support Wi-Fi connectivity, check the user manual for instructions on how to connect them to your computer or smartphone via a Wi-Fi network. Once connected, you can access the sunglasses’ storage through a file manager app or a specific companion app provided by the manufacturer. From there, you can transfer the recorded footage to your computer or smartphone.
- Companion apps: Some sunglasses may require companion apps installed on your smartphone or computer to facilitate the transfer. Check the manufacturer’s website or the user manual for information on available apps and their respective instructions.